
Your Shopping Cart
Loading...
EXTRA 10% OFF YOUR ORDER WITH CODE: LETSGO
Shop by Category
Hot Items
Hot Items
Ski & Snowboard Outlets
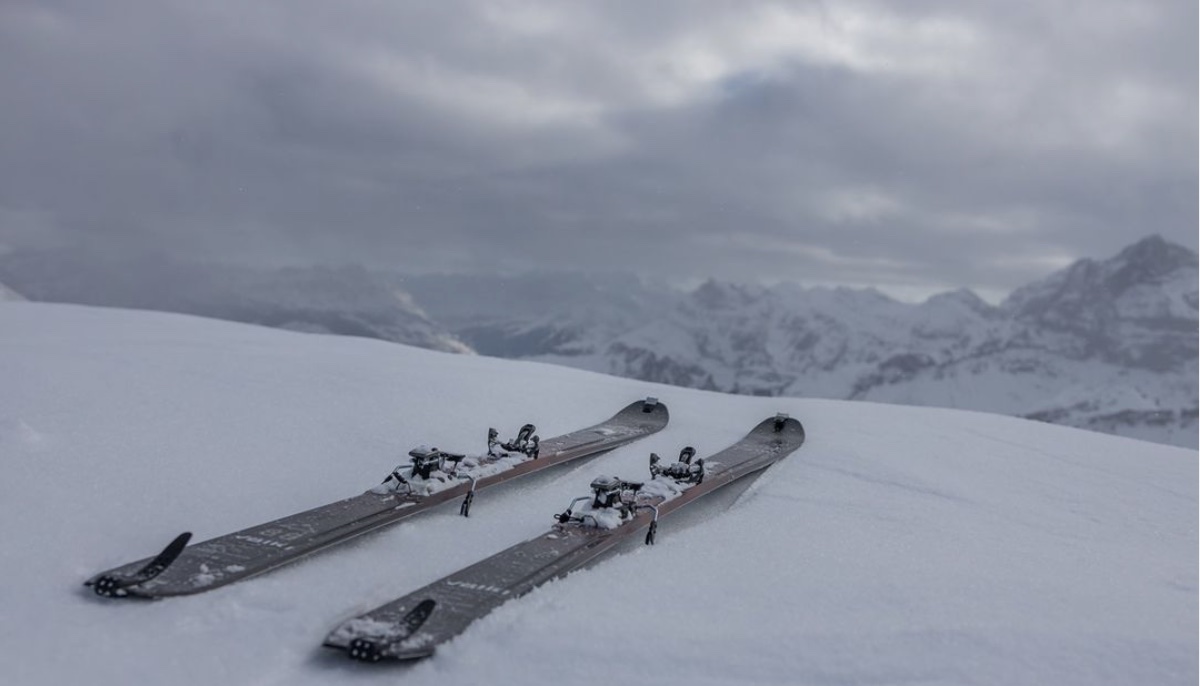
Ski Bindings: Which Alpine Touring Binding is Right for You?
Posted June 4, 2021 @ 10:39am | by Joe Riccio
Which Alpine Touring Binding is Right for You?
There's an overwhelming amount of good music out there. "CLICK CLICK BOOM," by Saliva, is a sweet song. Every time I click into ski bindings it pops into my head. Like music, skiing is an individual thing. Anyway… It reminds me that finding, understanding, and selecting equipment for your individual ski needs can also be overwhelming. There's a ton of information on the internet and a ton of gear to choose from. The fact that some great brands are making great equipment doesn't make choosing the right gear any easier. Understanding binding options is a particular challenge. How do you begin sorting through the equipment, the reviews, and the tangle of information in your quest to choose what's best for you? Honest and in-depth information about the right binding for your set-up, can be somewhat elusive. I'm here to help answer questions and untangle those mysteries for you.
Bindings are a wildly overlooked aspect of a ski set-up – and no, it’s not just about the color and the brake width. There’s so much more to alpine touring bindings than meets the eye. Your bindings are a point of contact, between boot and ski, that allows for efficient, or sometimes inefficient, transfer of power and energy from you to your ski. Proper ski boots are the most important aspect of energy transfer to the ski, but bindings play a role in that as well. So, they’re a critical part to the set up. Aside from a performance aspect, bindings are also the piece of equipment that keep you safe. They keep you locked in when you need to be, and let you release from the ski in the event of a fall.
Before I delve any deeper into laying out the differences between AT (Alpine Touring) bindings, I’m going to speak candidly for a second. I’m going to write up some information about ski bindings, and yes, some of it may be opinionated based on my skiing experiences, but it’s all going to be honest. As you read and evaluate which binding makes the most sense for you, I want you, as the reader and skier, to be honest with yourself about your skiing needs, abilities, and habits. If you are honest with yourself (or an expert if you need help) about where you’re going to be skiing, how hard you’re going to be skiing, how often you’re going to be touring, and your overall skiing ability, choosing the correct AT binding will be very easy and you’ll end up on gear that’s appropriate for you. That’s it. If that’s the only thing you take away from this blog, then I succeeded.
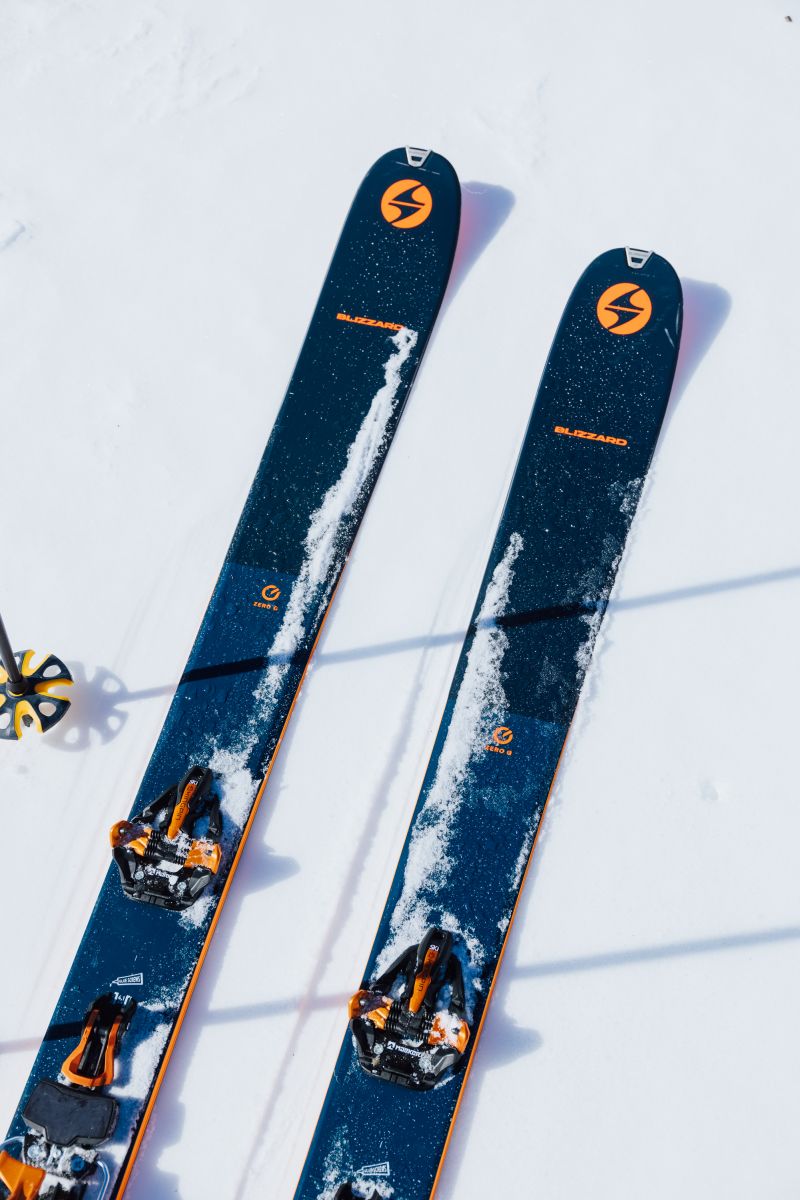
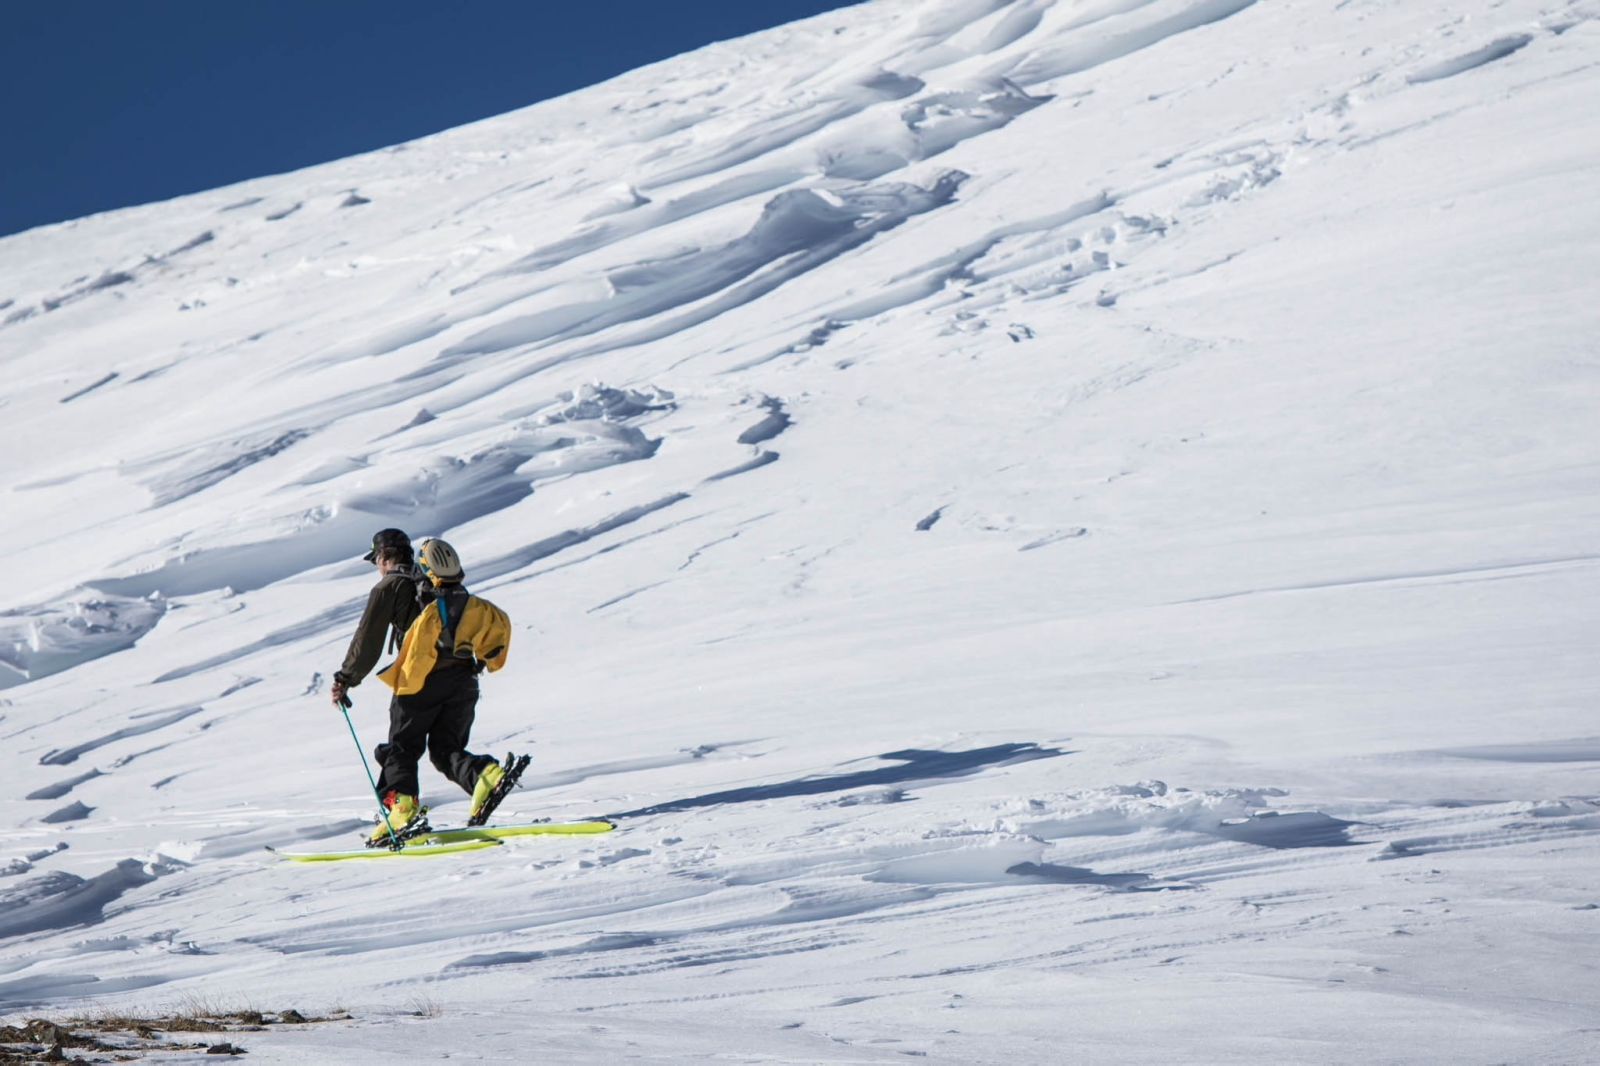
Alpine touring gear is different from regular alpine gear in the sense that it is built for both uphill travel and downhill skiing. This opens the skier up to a whole new facet of the ski world; you can take alpine touring gear pretty much anywhere that has snow on ground. You can ski places that don’t offer lift service, you can ski at resorts before they open, you can ski deep into the backcountry, but most importantly it gives us another way to enjoy the world of skiing. Having a set-up that allows you to travel up hill and traverse terrain, under your own power, is a ton of fun. The way this is achieved is with an up-hill capable binding. These alpine touring bindings let the boot release from the heel piece and then pivot near the toe to enable the skier to “walk” on skis. How cool is that? I mentioned earlier how bindings are often an overlooked aspect of a ski set up. You can technically get away with just about any binding for regular downhill skiing if you don’t care about performance. However, when it comes to touring, the binding you choose is just as important as the kind of skis you’re on. Ultralight bindings (Low-Tech), frame bindings, hybrid bindings and conversion kits, i.e., Daymakers or the CAST system, are a few main groups that make up the alpine touring binding options.
On the surface, each one of these bindings is exactly like the other in the sense that they can all get you uphill and then back down again, but they are very different from one another based on what performance aspect each binding prioritizes. Just like there is a right and wrong choice of boots for your feet and skiing needs, there is a right and wrong binding for each different type of skier and their skiing priorities. When we compare and break down these bindings further, it will become clear that although these are all AT bindings, they each represent different subsections of alpine touring. Let’s figure out which one is the correct Alpine Touring binding for you.
“I mostly ski at resorts but go touring a few times a season with this set-up.”
While the number of skiers venturing into the backcountry is growing, if you’re spending most of your days on snow at a resort you'll want a binding that performs better downhill than it does uphill. Alpine touring bindings with bigger mounting footprints and a little more weight are a necessity. Bindings like the Salomon Shift or the Marker Duke PT are going to be your best option. Both bindings transfer energy to the ski efficiently and provide a little more suspension, meaning they eat up some negative feedback before it makes it to your legs; like a car with a plush suspension handles potholes (Sidenote: Proper fitting ski boots are the most important part of your suspension). These slightly heavier, more downhill oriented AT bindings are an awesome solution for skiers who ski most days at the resort but still want the option to head into the backcountry for some touring on that same set-up.
The Marker Duke PT performs the best downhill out of the AT binding choices. Yes, it’s a little bit heavier than the Shift bindings, but it feels almost identical to a true downhill binding. The Marker Duke PT is incredibly easy to use at the resort because you just click in and go. When you do decide to use it for touring, all you need to do is pop the toe piece off, pull the small roller on the brake backwards, step into the pin tech toes and go. The toe piece can be stashed into a jacket or pack pocket for the way up so there is less weight on the skis as you glide up the hill. The Marker Duke PT is a well-constructed binding that can handle all the abuse you expose it to at the resort and you’ll always feel very confident bombing down trails or dodging through the trees with this binding. It’s a no-nonsense binding that performs incredibly well no matter the situation. Both the Marker Duke PT and the Shift are DIN certified to be compatible with a wide range of ski boots that have pin tech toes. The only real differences between the Shift binding and the Marker Duke are weight and the way you step into them in touring mode.

The Shift is a handful of grams lighter than the Duke PT while still providing resort-ready downhill performance. The Shift allows for more snow feedback to be transferred through the binding and into the boot making the ride feel a little bit harsher over variable snow conditions such as boiler plate days in New England when the snow is more like a glacier. Stepping into the Shift binding in touring mode is a little more of a process, still very easy, but not as easy as stepping into the Duke PT. With the Shift, you need to pull back the center block of the toe piece to reveal the pins and then press down on the lever in the front to open the toe piece wide enough to line the inserts in your boot with the pins on the binding. Again, after a little practice this is very easy, but stepping into the Duke PT in touring mode is just that - you step in and go. Both bindings offer two different riser heights. The low riser is almost flat, while the high riser is around 10 degrees making steeper ascents less taxing. These two settings are generally more than enough for most days you’re out touring. As far as uphill efficiency goes, these bindings compete closely. With the Duke toe piece removed the weight difference is almost negligible and both bindings utilize pin tech, allowing your gait up the slope to feel natural.
The only boots you cannot use with these AT bindings are touring boots that don’t have full toe or heel lugs (Atomic Backlands, Arc'teryx Procline, Dynafit Hoji, Salomon X-Alp...to name a few). If your boot doesn’t have pin inserts, then you’ll need to investigate different options such as a frame binding or a Daymaker which allow you to tour with boots that aren’t equipped with pin inserts. I’ll touch on both Daymakers and frame bindings later.
TL; DR: If you value a lighter set up for touring but still spend most of your days skiing at the resort the Shift may be a better option. If you ski somewhat aggressively and want a more solid underfoot feel, then go with the Duke PT.
“I plan on touring most of the time but may occasionally use this set-up at a resort.”
This is where things get a little trickier, as a skier you’ll need to be honest about what you prioritize and be honest with what kind of things you’ll be doing in the back country and at the resort with this set-up. You’ll also need to determine your skiing ability. Some of the lighter downhill bindings may not be the best for novice skiers as they transfer energy less efficiently, are less forgiving and more prone to pre-release if your weight is not distributed over the ski properly when conditions get tougher.
There are some wildly lightweight bindings on the market right now: The Marker Alpinist, Black Diamond Helio, Atomic Backland Pure/Salomon MTN Pure to name a few. While these bindings may entice the skier looking to put together an ultralight set-up, they don’t make sense for the resort. I’ll explain down below who those bindings make the most sense for. You also need to remember that with lighter weight bindings there will be a loss of downhill performance, so if you still want great downhill performance, don’t get an ultralight weight binding.
Okay, back to business. If you do want an AT binding that tours well, since you’ll be spending more time in the backcountry, then you want something a little lighter. The Marker Kingpin makes for an awesome option here. It’s a much lighter binding than the Shift or the Duke while still offering a fully DIN certified heel piece to ensure consistent release, if need be. The toe piece on the Kingpin uses pin technology, so you can only use this binding if your boots have pin inserts. The heel piece provides a solid feel that allows for good energy transfer to the ski and dampens the ride a bit while cruising over tougher snow. This binding, in touring mode, is awesome. It’s also super easy to switch into touring mode, you just need to flip the lever in the middle of the binding from “SKI” to “WALK” and then up you go!
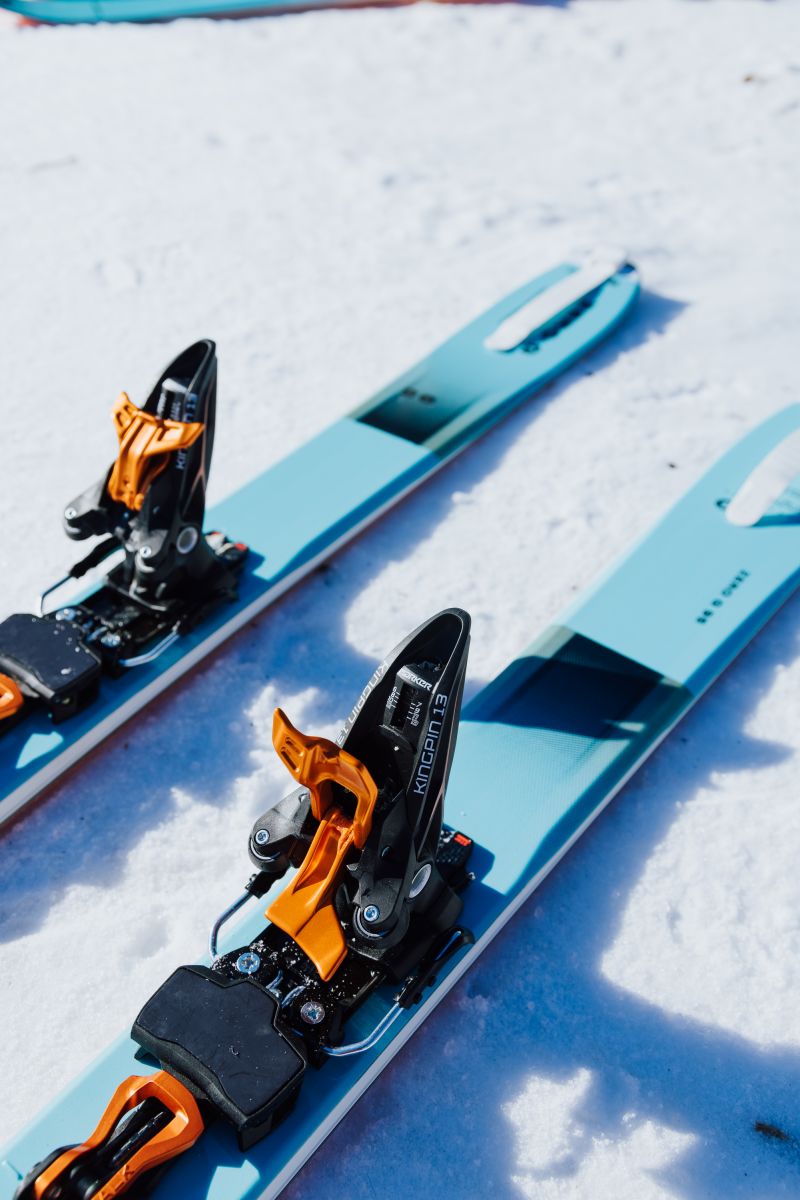
The Kingpin features three different heel riser positions which is great for longer tours over variable terrain that undulates from long flats to steep headwalls. In a resort setting, the Kingpin does better than an ultralight binding but it doesn’t ski nearly as well as the Duke PT or the Shift. The pin toe piece on the Kingpin offers serious weight savings, but that comes at the cost of less dampening and preciseness on the downhill side of things. However, if you prioritize a lighter set up for touring, you’ll sacrifice some downhill performance. That’s okay, all skiers choose to prioritize different aspects of touring.
If you're looking for a lighter AT binding than the Kingpin but still want a binding that works for the occasional resort day, the Dynafit Rotation 12 is about as light as you should go. The Dynafit has a pin toe and a pin heel. It can only be used with boots that have pin inserts in the heel and toe lugs and it is also compatible with boots without full heel and toe lugs. This is certainly not a binding you would want to use every day in the resort, but it does offer enough dampening and has a larger mounting footprint than some other lightweight bindings, so it performs well enough to get you through the day. This binding is not as built up as the Kingpin or the Shift, so it doesn’t handle abuses as well, i.e., bumps, trees, hard carving. The Dynafit excels in touring mode because it’s light and offers various riser heights to make ascents easier on your legs. However, I feel like the Dynafit has a an almost vague, or mushy feel under the heel piece that is not nearly as precise as a Shift or even the Kingpin which makes resort skiing a bit of challenge. It’s also important to remember that as we discuss lighter binding options you will have a tougher time driving big skis with them. Just like you shouldn’t use an Atomic Backland touring boot to drive a Blizzard Bonafide, you shouldn’t use an ultralight binding to drive bigger burlier skis. It won’t be fun.
TL; DR: If you want something light and efficient for the way up but can still go downhill well, get the Marker Kingpin. If you care more about saving grams and less about downhill performance but still want a binding that is fine for a few resort days, get a Dynafit Rotation. If you don’t mind a few extra grams on your skis for touring and want something that feels more like a downhill binding, get a shift.
“I don’t care about weight; I want the best downhill performance. Period.”
There aren’t a whole lot of options that fall into this subsection of Alpine Touring bindings. However, the few that are out there are great. The Marker Duke PT 16 offers unrivaled downhill performance while still being able to go uphill well. The large mounting footprint, magnesium heel housing and freeride style heel make for one of the best feeling downhill bindings I’ve ever been on. It is on the heavier side of the spectrum for AT bindings, but we aren’t concerned with that here. This binding is built to handle anything you throw at it in the backcountry or resort. Trees, bumps, booters, whatever your heart desires, the Duke can handle it. It's a much burlier build structure compared to the Shift binding which, in my opinion, gives it that little bit of an edge as far as downhill goes. The Duke PT feels the most similar to a traditional downhill binding out of the AT bindings. The Duke PT 12 is great too and better suited for lighter weight skiers who don’t turn their DINs up very high or ski aggressively.
The Duke PT 12 doesn’t have a magnesium heel housing, so it’s a bit lighter and less overbuilt. If you want to compare these AT to true downhill bindings, the Duke PT 12 is like a Marker Griffon or Tyrolia Attack 14, while the Duke PT 16 is like a Marker Jester or Look Pivot 18.
If you don’t like the way the Duke operates in uphill mode, the Shift would make sense for a downhill-focused touring binding too. Both the Shift and Duke are very close in performance, but I think the Duke is better on the way down. The heel piece on the Duke offers a more confidence inspiring, locked-in feel compared to the Shift. But hey, that’s just me and we know everyone prioritizes different things. If neither of these options seem right for you, there is one more less popular choice, and that is the CAST touring system.
I won’t go in depth here but the long and short of it is this: CAST takes a Look Pivot 15 or 18, puts a fancy locking brake mechanism on the heel piece and makes the toe piece removeable so you can swap a touring binding toe piece onto the ski. This lets you ski down on a legit Look Pivot and tour on an efficient toe piece. These ski and tour well. Downhill feels identical to a regular Look Pivot. My only gripe with the CAST system is the fact that they are a little more prone to icing and tend to make transitions to downhill a bit of a hassle. But hey, if you like the way Look Pivots Ski and don’t mind carrying different toe pieces around, more power to you.
TL; DR: Duke PT 16 skis the best out of the bunch and feels the most powerful. If you weigh less or ski more casually grab the Duke PT 12. And if you want a slightly lighter binding that still performs well downhill, get a Shift.
“I want a light binding for long tours. I need something light and fast, and I really only care about how efficient I can be on the way up.”
If you’re looking to get into touring, or you’re already into touring, but don’t have much desire to crush the downhill and want something fast, light and uber efficient on the skin track then you want an ultralight binding. There are a lot of different bindings in this category: Atomic Backland tour, Marker Alpinist, Salmon MTN Pure, Dynafit Superlite and TLT, Black Diamond Helio Series (Manufactured by ATK). There’s a lot to choose from in this category and the differences between each of these bindings is quite nominal. Ultralight bindings generally weigh in less than 350 grams and have very limited features. They’re simple tools built to excel at getting you up a slope or through the backcountry as quickly and efficiently as possible. These bindings allow for the most natural gait while touring and are often equipped with a few different riser options to make steeper ascents a little less taxing.
While there is a plethora of options, I think the Marker Alpinist is the best all-around, ultra-light touring binding currently on the market. For its weight, the dampening this binding provides is pretty incredible. The Marker Alpinist weighs in at about 250g per binding. That’s the same weight as about 5 Pop-Tarts, or around 100 pennies. That’s light. The Alpinist has 3 different riser heights: 0 degrees, 5 degrees, and 9 degrees. These adjustments make the ascent less taxing and more efficient. Most of the bindings in the ultra-light category feel similar on the way up. However, on the way down the Alpinist outshines the competition. The Alpinist has a larger mounting pattern than some of the other ultralight bindings, which allows for better energy transfer to the ski. The heel piece on the Alpinist also offers ski flex length compensation. This means that as you bend and torque the ski on the way down, the binding heel piece moves with the ski, in turn resulting in a lower chance of pre-release since there is less stress on the binding. A good skiing binding is a good skiing binding, and for this weight class the Alpinist is the best.
It is important to remember that these ultra-light bindings will not be able to drive bigger, heavier skis well. If you’re looking to tour on bigger powder skis, or a ski with some metal in it, you’ll want to look into a binding that’s better suited for downhill that transfers energy to the ski better. Also, if you want to ski more aggressively, this may not be a great binding choice for you. However, if all you are worried about is efficiency on the way up and the ability to get back down an ultra-light binding is great. Light, fast, simple.
“I want to try touring but I’m not ready to invest in all the new gear yet.”
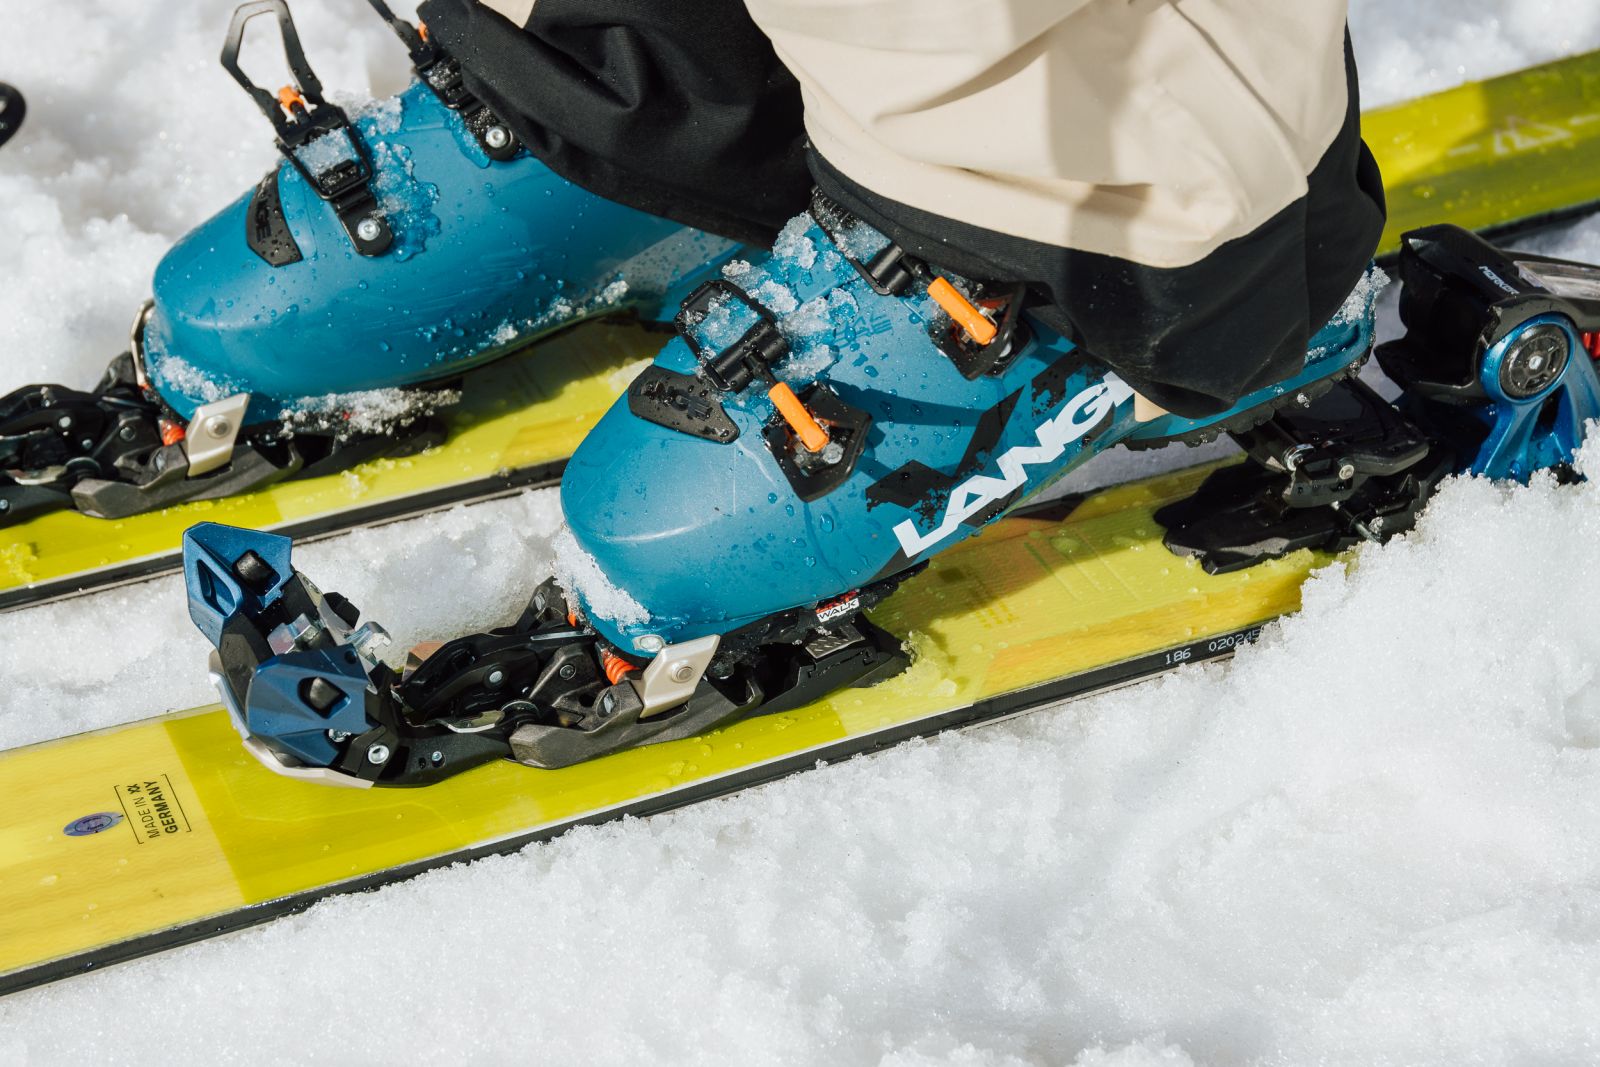
Getting into touring can be a lot of fun. Buying new gear is always fun. But if you’re not quite sure you’re going to like touring then it doesn’t make much sense to drop a bunch of cash on something you might never use again, or have fun doing. (Side Note: if you like skiing, you’ll like touring. It’s a ton of fun). There are a couple options if you’re not ready to commit to a buying a bunch of gear. Frame bindings, like the Marker Tour F12 or Salmon Guardian, can be mounted on almost any ski and enables you to get into the touring world for around 400-500 bucks, or cheaper if you wanted to scour Facebook marketplace for some used ones. The other option is to get a conversion system like a Daymaker Alpine Touring Adapter. Both choices can be used with boots that don’t feature pin inserts.
Frame bindings, in my opinion, are kind of like the rental skis of the AT binding world. They get the job done but they don’t offer anything extra to make the skiing more enjoyable. Frame bindings don’t make touring less enjoyable per se, but there are better options out there. The Marker Tour F12 is on the lighter end of the spectrum, compared to other frame bindings, but they’re still heavy. The binding, as a whole, isn’t much heavier than a Duke PT or a Shift, but you’re lifting the whole binding up each step of the way up because you don't release from the heel. Frame bindings, in touring mode, pivot lower down and farther away from the ball of your foot making them less efficient and more taxing since this doesn’t allow for as natural of a gait as a pin binding does. I will say, if you don’t mind the extra weight on your feet or inefficiency on the way up, these bindings do feel very solid on the way down. They’re basically a downhill binding on a pivoting frame. The bindings are very simple to use, feel solid on the way down and offer a ton of dampening over tougher snow.
Daymakers are similar to frame bindings except they click into the downhill bindings you have mounted on your skis. The Daymakers let you use your current downhill set up to go up hill. This is great for someone looking to save a few dollars or if you really like the way your downhill set up skis and don’t want to compromise that. Also, Daymakers don’t require the use of boots with pin inserts. However, like frame bindings, Daymakers aren’t efficient on the way up. Yes, they do allow you to ski down on your alpine bindings which is awesome, but they’re heavy for the trip up and are a bit of a hassle to set up. Daymakers are also a little tough to deal with transitioning from tour mode to downhill and they take up a ton of space in your pack.
Between these two I think the frame binding option makes more sense. They don’t ski that differently from a true alpine binding and they’re much easier to use than conversion kits.
TL; DR: If your friends won’t stop pestering you about joining them on a few touring days, but you aren’t ready for a new set up, then grab a frame binding like the Marker Tour F12, and up you go.
“I already have a downhill ski set-up, now I want to add a touring rig to my quiver.”
Building a quiver is an awesome way to get the most enjoyment out of your ski season. No one day is like the next, so it’s nice to have a few different options as far as skis go. Since you already have a downhill resort set-up you don’t need to focus as much on choosing an AT binding that works well in the resort, unless you want too of course. Putting together another ski set-up is where you’ll need to be the most honest with yourself, or the shop employee, about what it is you’re looking to get out the set-up. Fortunately, building a touring set-up is a little easier because you already have a set-up that prioritizes resort performance.
The AT binding world is your oyster, you can choose whatever the hell you want. There are ultralight options, like the Marker Alpinist. There are heavier options, like the Marker Duke PT 16. And then there’s a whole lot in between. It really comes down to the type of skier you are, where you’ll be skiing and what you want to get out of the set-up. If you’re driving a bigger, heavier touring ski you’ll want a bigger heavier binding. If you’ll be using this ski in harder snow conditions you may want something that offers more dampening to the ride. If you’ll be doing multi-day hut hikes through the backcountry, you’ll appreciate an ultralight binding to make the tour easier. If you’re skiing tough icy chutes, you’ll want a binding that is sure to keep you locked in and provides stability when conditions are unforgiving. If you only use this set-up in softer lighter snow, you can get away with lighter bindings. What I’m trying to highlight here is that it’s all very personal and there is a lot of factors you should pay attention to when choosing a binding. Selecting the wrong one could result in you having an unenjoyable experience while you’re out on the snow. I surveyed a few of our skiers in the shop to see what they would choose for an AT binding if they were building a touring set-up so you can get some perspective.
We’re all different skier types at The Ski Monster. Also, it's important to remember that we are talking about putting together a touring ski set-up to add to your quiver. This is in addition to your downhill ski set-up. Not a one ski quiver. Personally, if I were to put together a touring set up right now, I’d go with the Marker Kingpin for my AT binding. It’s light enough for some longer tours but still offers solid boot retention and full DIN certification. The Kingpin is wildly easy to use which I enjoy because I don’t like fussing around with gear at the top of the hill while I’m transitioning. The Kingpin has enough mass and transfers energy well, enabling me to drive burlier skis (compared to other touring capable skis) like a Rustler 10 or a Fischer Ranger FR, without feeling like I need to adapt my skiing style to work for the binding. After all, I want the binding to work for me. Andrew also skis a Kingpin. His reasons being that the binding is light and easy to use while still having a heel piece similar to a downhill binding that lets him feel confident through trees or chopped up terrain. Molly skis the Atomic Shift 10 because she values a binding that skis well downhill and she doesn't mind the little bit of extra weight during her tours. The shift is a little more work in transitions, compared to some other touring bindings, but if you’re not in a serious rush that’s a nonstarter. George skis a Kingpin as well. “Just based on my overall skiing style being more aggressive, I’m more of a ski driver than a passenger. The Kingpin lets me drive skis confidently. However, if I wasn’t concerned with driving the ski very hard, I’d go alpinist. It’s light AF.” Devon said, “I use the Marker Alpinist on my touring skis. For me a true touring set-up is 100% built around weight. Especially in New England where snow cover in the backcountry is questionable at times, I want a set up that is super lightweight in case I’m carrying my gear as often as I’m skiing. Unless I’m skinning up a resort, a hard charging binding is not important to me since the skiing is likely to be more technical rather than fast and aggressive.” I also talked with Matt and let me tell you, he really likes to talk; he had a very long-winded explanation to my simple question of what he uses for a touring binding and why:
For me personally I have a few setups, but at this point some are aging/unused. I was lucky enough to work for a manufacturer who produced and sold a myriad of touring gear from super lightweight skimo race gear to alpine freeride touring gear. I can’t stress enough that you don’t need 3 different setups with 3 different bindings to have a good time, but it's always nice to have options. My go to setup nowadays tends to be an all mountain freeride ski, around a 100mm waist, with a Shift binding on it. That can get me through most situations with a smile on my face.
That being said, here are my setups and why, also take into consideration; I’m a bigger guy, powerful skier and almost always have a camera pack on my back.
1. Light and fast (fast being a relative term)
Fischer Hannibal 96 with a Marker Alpinist - While not being the lightest setup out there, it’s as light as I need. Is it skimo race setup light? No, I’m not racing anyone up the hill and I’m not in spandex. For me, this ski/binding setup is perfect for doing some pre/post operating hours laps on a resort or longer tours where the terrain on the way down isn’t too intense. These low-tech bindings are certainly capable of handling gnarly terrain, but I prefer something that feels a bit more secure under my feet when things get spicy.
10% lift service / 90% touring
2. The Swiss Army Knife
Like I said before, if I’m choosing ONE walkable binding to use to ski at the resort and in the backcountry it’s a Shift or a Duke PT. For me, it’s a Shift. Partly because it came out first in all fairness. A Shift on a Ranger 102 FR can honestly get me through any situation I might find myself in. It’s a truly remarkable binding for anyone looking to start dabbling in some backcountry skiing, maybe just looking to get some “fitness laps” in at the resort during off hours, or somebody looking for a one binding quiver where they split time riding the chairlift or throw a pair of skins on. I’m somebody who will gladly sacrifice a few hundred more grams on the uphill slog to have a more confident downhill experience. You aren’t going to notice a huge difference in downhill performance between your alpine binding and a Shift, and I’d say majority of people won’t feel any difference at all between their alpine binding and the Duke PT.
50% lift service / 50% touring
3. Uphill capable, downhill focused
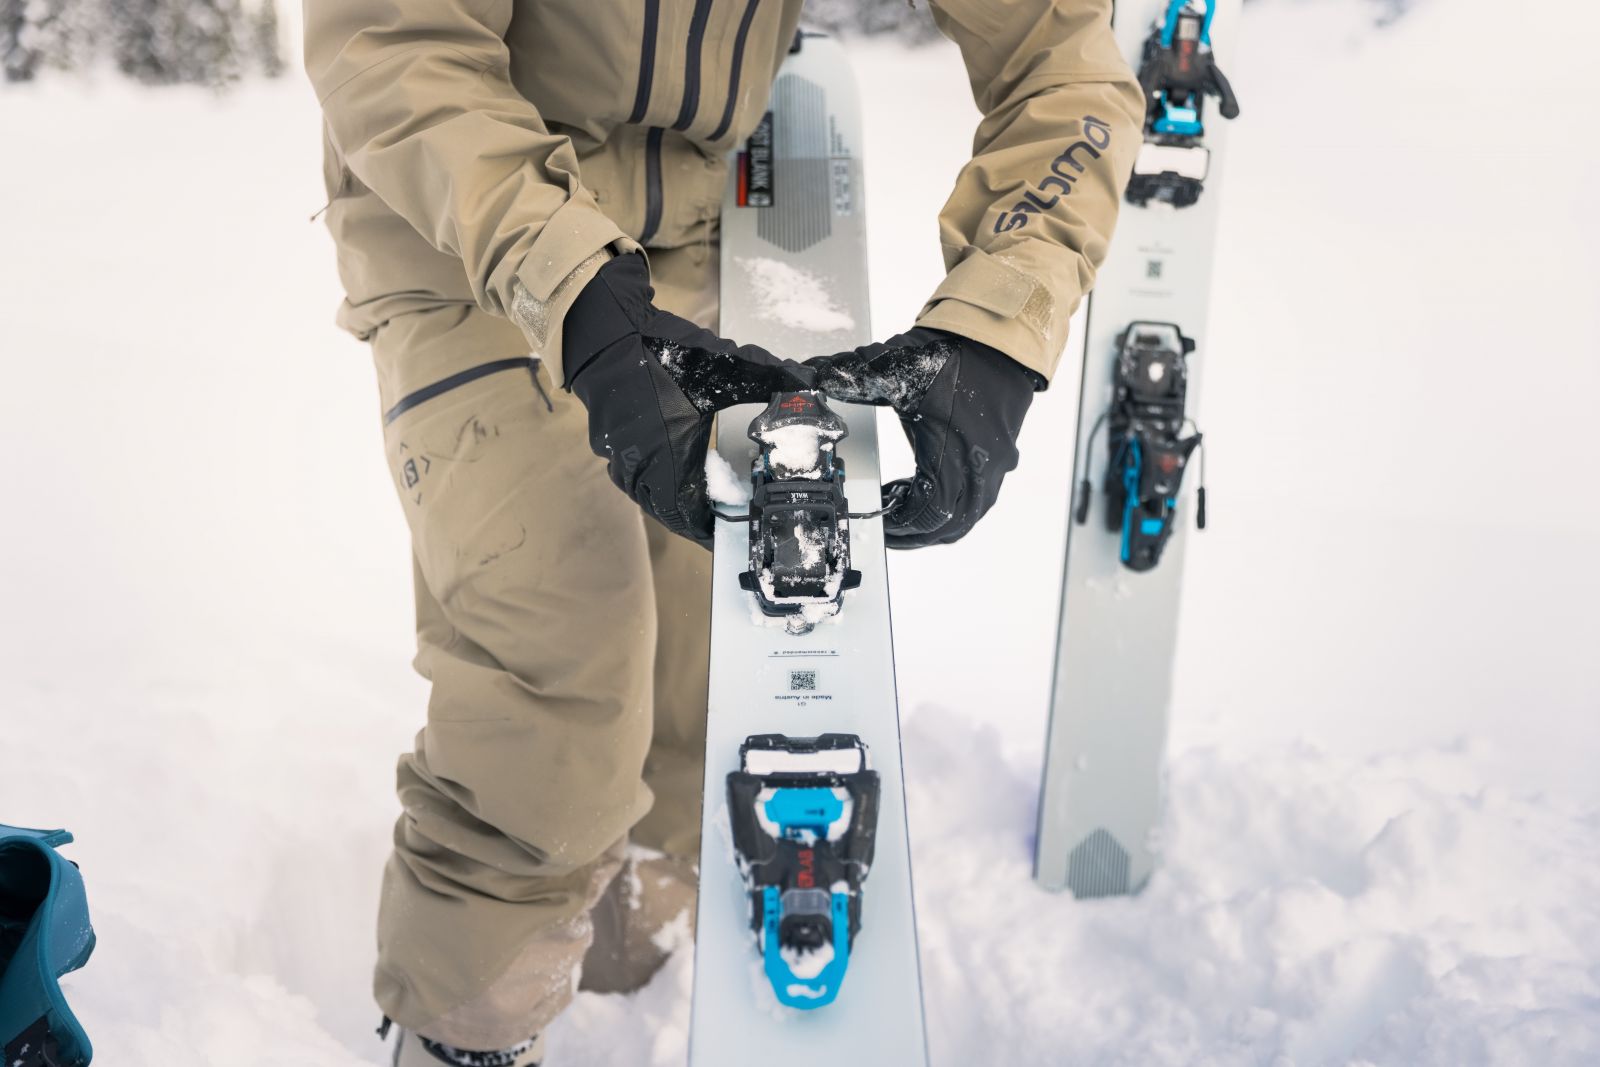
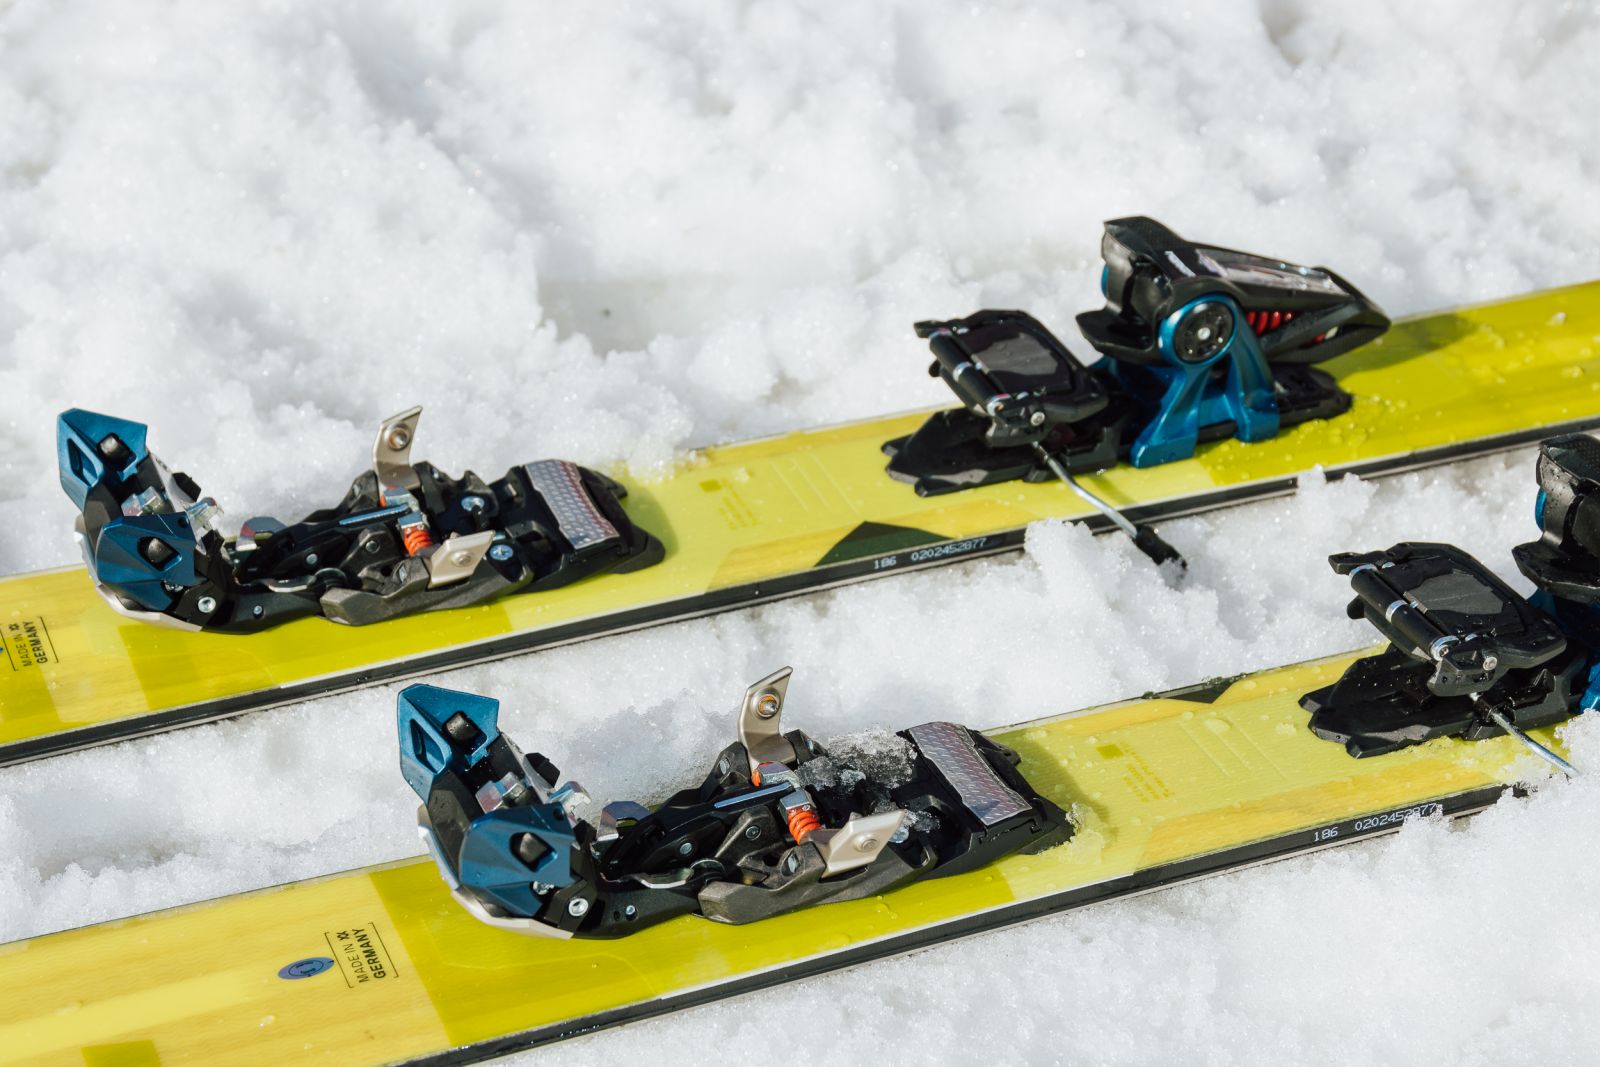
I’ve got a frame binding (Adrenalin 16) on a Ranger 115FR. This set-up is THICC and comes out of the basement a couple times a year, if I’m lucky. It’s been on many a chairlift for a powder day, it’s been cat skiing and even Heli-skiing in Russia with me. It’s a damn heavy setup that I don’t love going uphill with, but it’s perfectly capable and it’s nothing but confidence on the way down. This was my setup typically when I was on athlete shoots or press trips where I had a heavy camera pack on, and only had to throw skins on for somewhat short sections in order to get into position to shoot. While I have done a few long slogs with this setup, I wouldn’t choose to anymore at this point, because we have Shifts and Duke PTs. Now that I think about it, I’m going to retire that setup! Haha!! Nowadays if I didn’t have a boot with tech toes and wanted to have a walkable binding, I would go with something like the marker F12. It’s lighter than the adrenalin or original Duke and you’ll still get downhill performance you are looking for. Sure it’s a bit heavier than a pin binding and your toe pivots in a different spot, but it can still be a great option for somebody looking to get into a walkable binding that doesn’t have a boot with tech fittings.
80% lift service / 20% touring
That guy can really ramble. Anyway... Here's Matt on his "THICC" set-up with a frame binding
Hybrid bindings like the Marker Duke PT or the Shift offer the best of both worlds with very little sacrifice in downhill and uphill performance. They aren’t the lightest, but they ski well and feel most like a true downhill binding. If you’re looking for a binding that feels like a more traditional downhill binding, go with a Duke PT or a Shift. The fact that they both feature a DIN certified toe and heel piece is a plus too if you’re looking to reduce the chance of injury due to pre-release or not releasing when the skiing gets hairy.
Ultralight bindings do well on longer tours as they’re incredibly light, obviously, and efficient. However, these ultralight bindings are pretty one dimensional in the sense that they’re great on the way up, not so awesome on the way down. Sacrifices need to be made on the downhill side if you want a highly efficient uphill binding. The Marker Alpinist is my go-to in this category. It has two different riser heights, it’s easy to step in and out of and, compared to other ultralight bindings, it feels the smoothest over variable terrain. For its weight, the alpinist does a good job dampening out rough snow conditions even when it’s strapped to a lighter weight ski.
Frame bindings provide the stability and DIN certification of a downhill binding, but they do have a negative impact on the performance of the ski. Frame bindings are heavy, cumbersome, and they don’t pivot from the most efficient spot in touring mode. Combine all of this and you get a binding that’s just okay for touring, compared to the newer tech that’s on the market these days. Frame bindings will get you up the hill and back down with confidence but there’s a lot more weight on the foot that makes the uphill a drag and these bindings just do not ski as well as a Shift or a Duke PT on the way down.
“I really didn’t want to read any of this” and “Shit, can you PLEASE wrap this up already?”
Alright, there is no best alpine touring binding on the market, but there is a best alpine touring binding for you. It's all personal and based on your skiing or touring priorities. Each different alpine touring binding is better for one thing and worse for another. The lighter the binding, the worse they ski downhill and the worse it is at driving bigger, heavier skis. But that’s not what they’re built for. Hybrid bindings feature alpine heel and toe pieces, ski better downhill and are often safer for unforgiving conditions. They can also drive bigger heavier skis and make more sense for skiing tougher lines. Frame bindings are “meh,” but get the job done for getting uphill and ski downhill confidently. Conversion kits are often a lot of work but are a cheaper solution to getting into the backcountry. Let’s be real though, the solution to all of this is to build a quiver of about 5 or 6 skis so you never have to make sacrifices, and you’ll have an arsenal of different skis for any skiing conditions. Don't hesitate to reach out to us or set up an appointment to come talk and we can help walk you through what binding makes the most sense for you if there isn’t enough info up above.
Filed Under: Ski Reviews
| Permalink