

Your Shopping Cart
Loading...
Hot Items
Ski & Snowboard Outlets
How To Fix a Broken Boa System
Posted August 9, 2018 @ 3:32pm | by Neil Soucy
Before you can begin fixing your broken boa system, you must first identify exactly which system your boots use and the length of the cable or lace needed. This is the information you will need to order the correct repair kit for your snowboard boots.
While the process of fixing different Boa systems is essentially the same, some systems will need to be handled a little differently. On snowboard boots, the most commonly used systems will be a form of either the Boa H3 System or Boa M3 System. To correctly identify the system you are working with, refer to the photos below.
H3 H3 Coiler M3

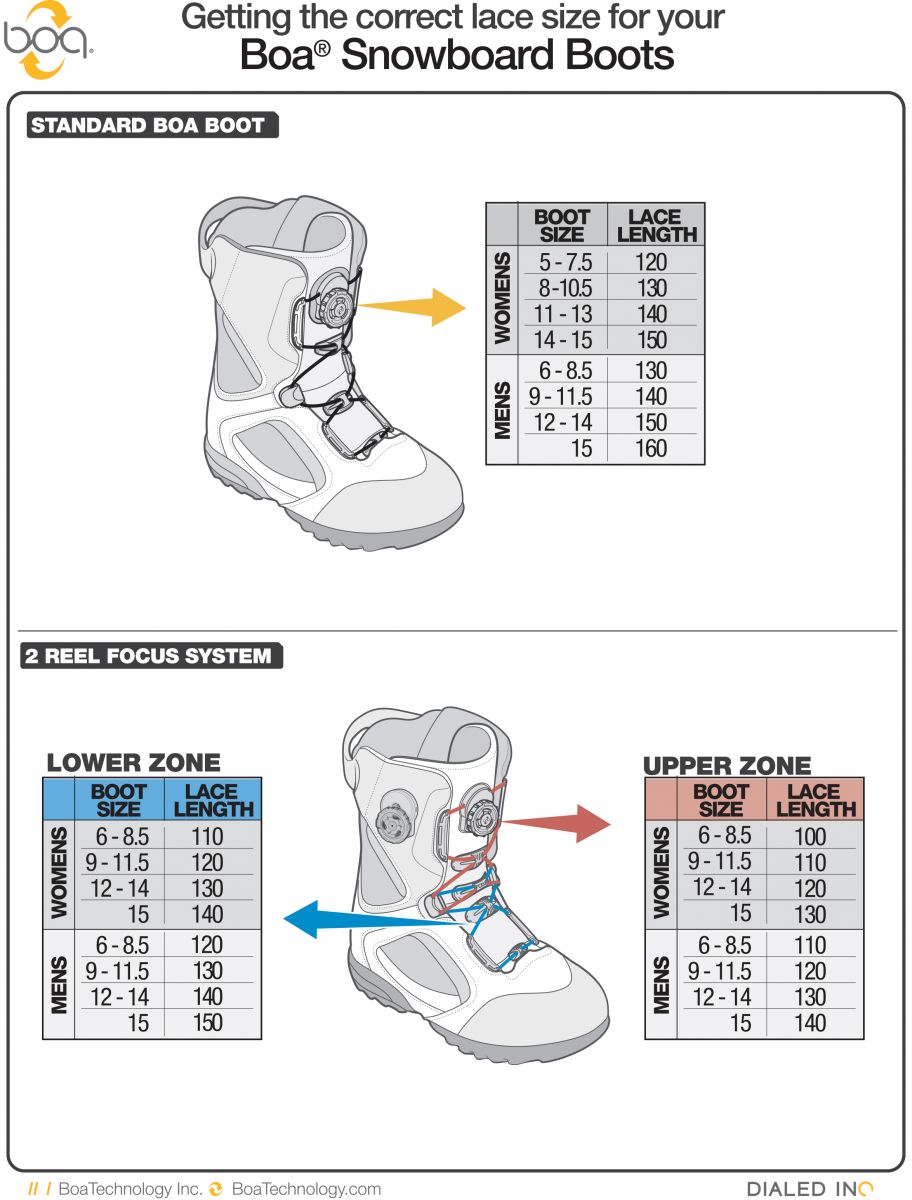
Now that you know which system is used on your boots, check inside the tongue of your boot to figure out the correct cable or lace length you need. If the tag has worn off or you’re not sure where to look, refer to the chart below for recommended lengths.
With the correct repair kit, we can now begin to disassemble, replace the broken cable or lace, boa dial and spool, or both, and then reassemble.
How-To
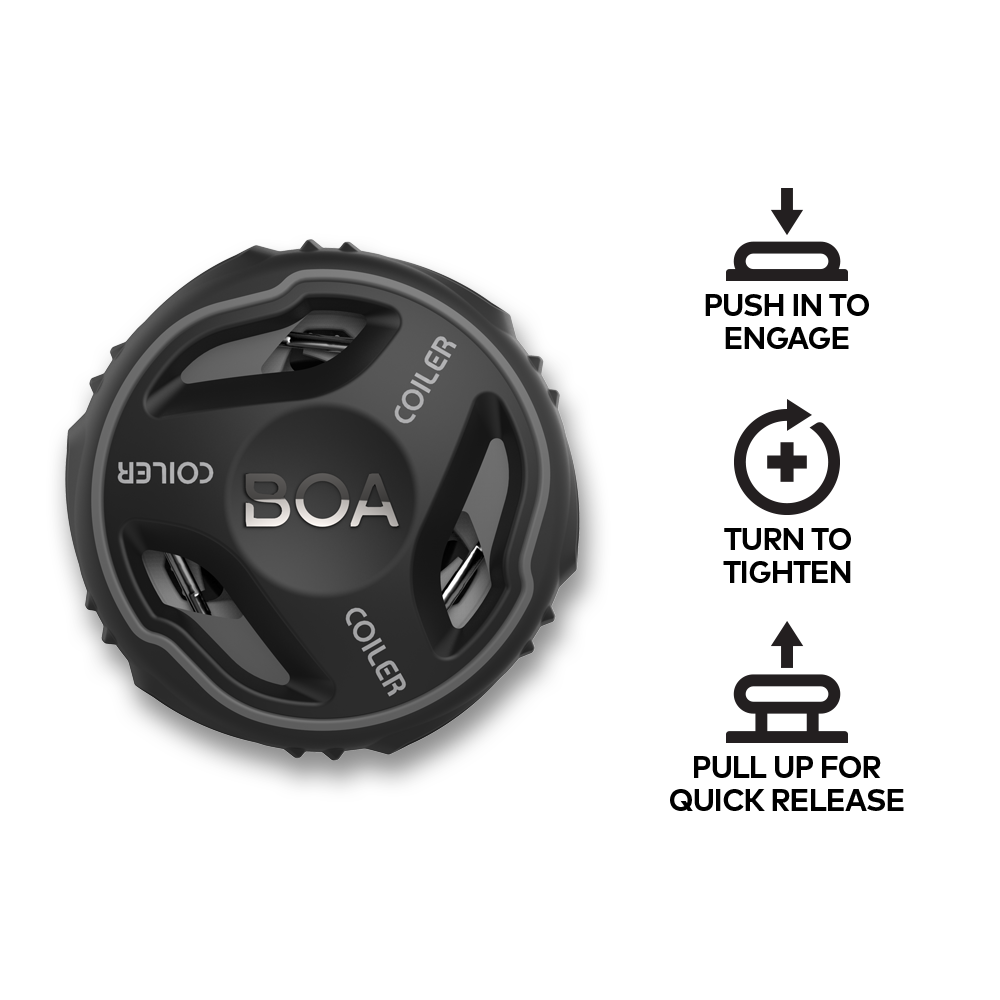
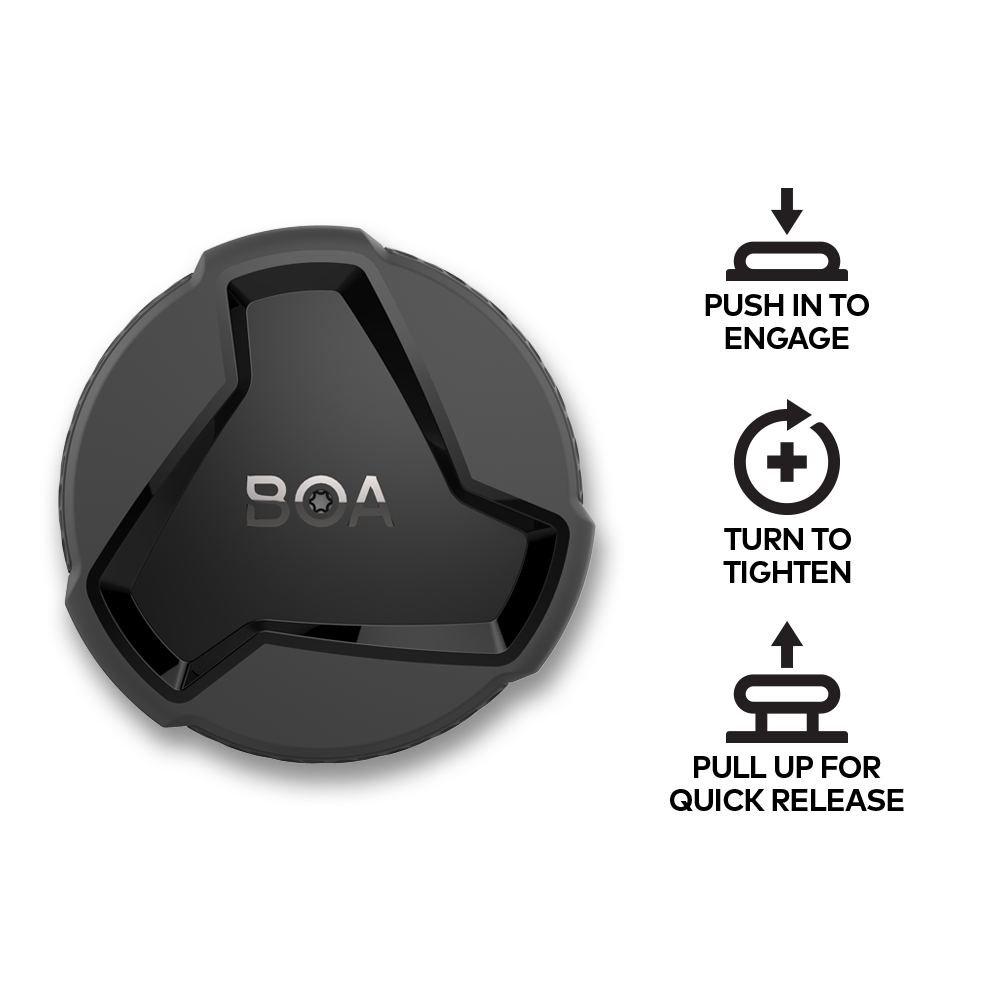
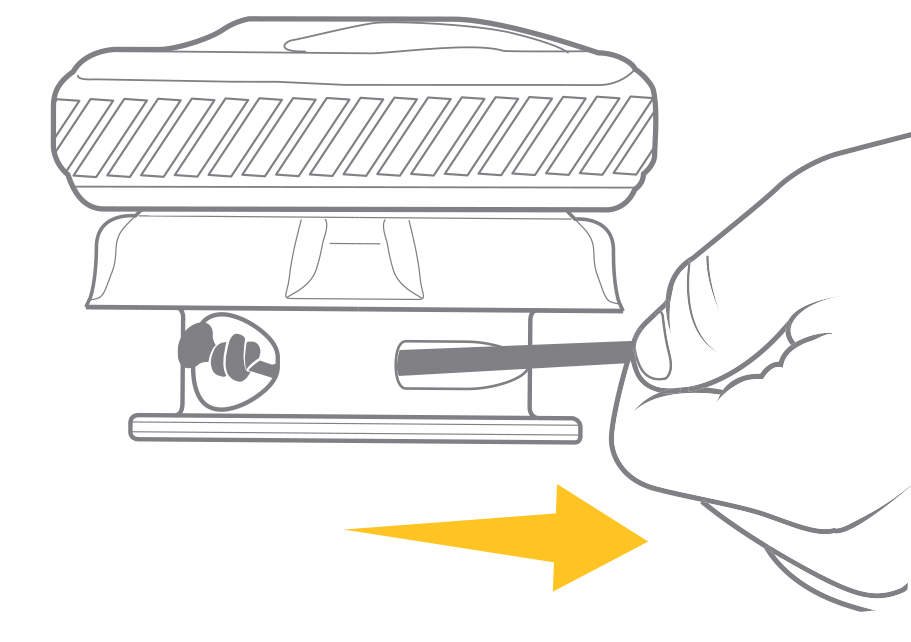
Step 1: Remove Dial
-
For H3 Systems: Pull out on the dial, releasing tension in the cable or lace, find the small window around the base of the dial housing, insert a screwdriver or small flat object and press down on the tab, turn the reel housing clockwise until it stops, and remove the reel.
-
For M3 Systems: Insert T6 tool included in repair kit, turn counter-clockwise, loosen dial and remove.
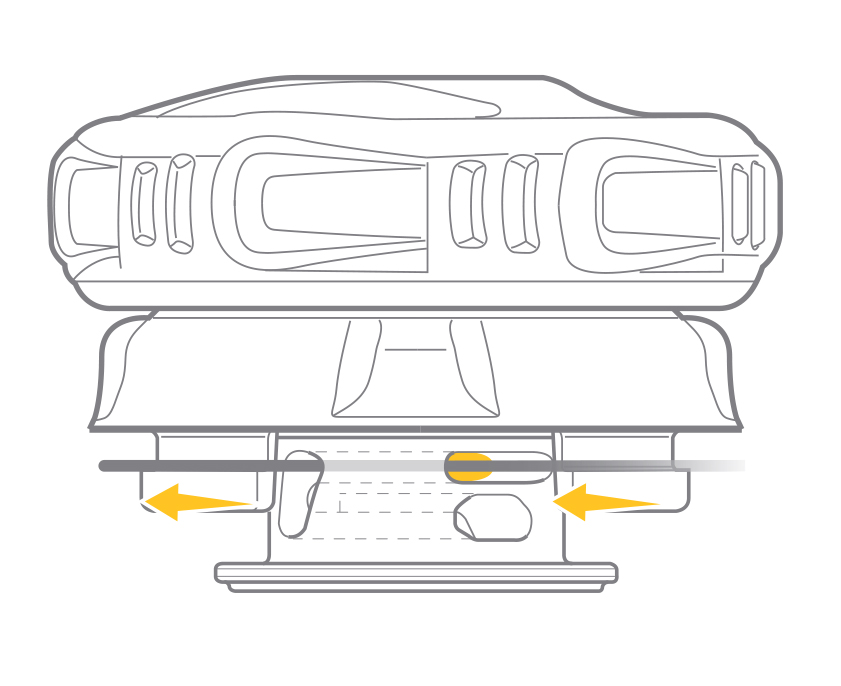
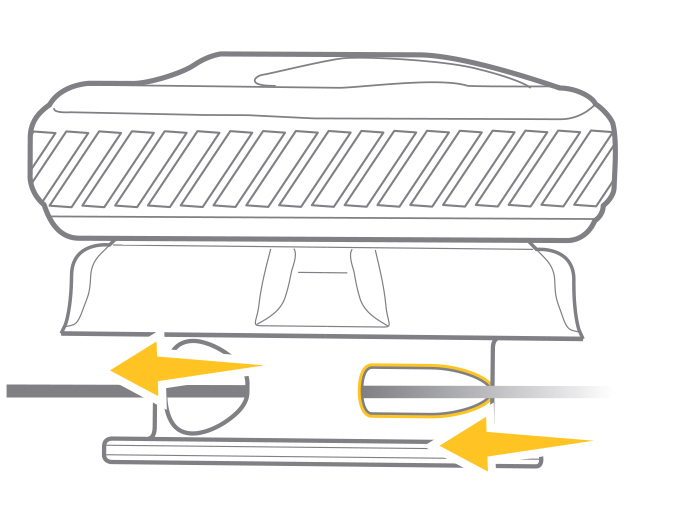
Step 2: Remove Lace or Spool
-
For H3 Systems: Loosen cable or lace, disengaging ends from spool, and remove all cable or lace from spool.
-
For M3 Systems: Pop out spool from housing and remove spool and all lace or cable from boot.
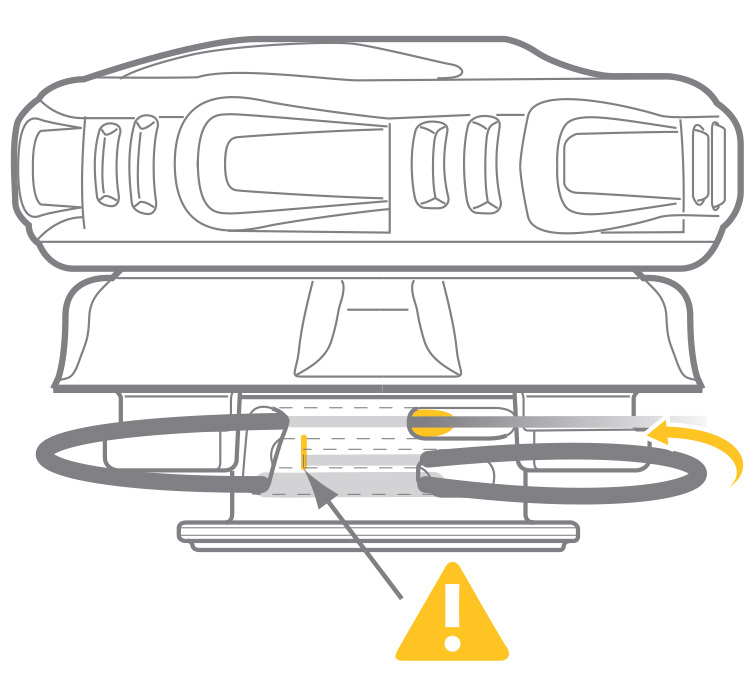
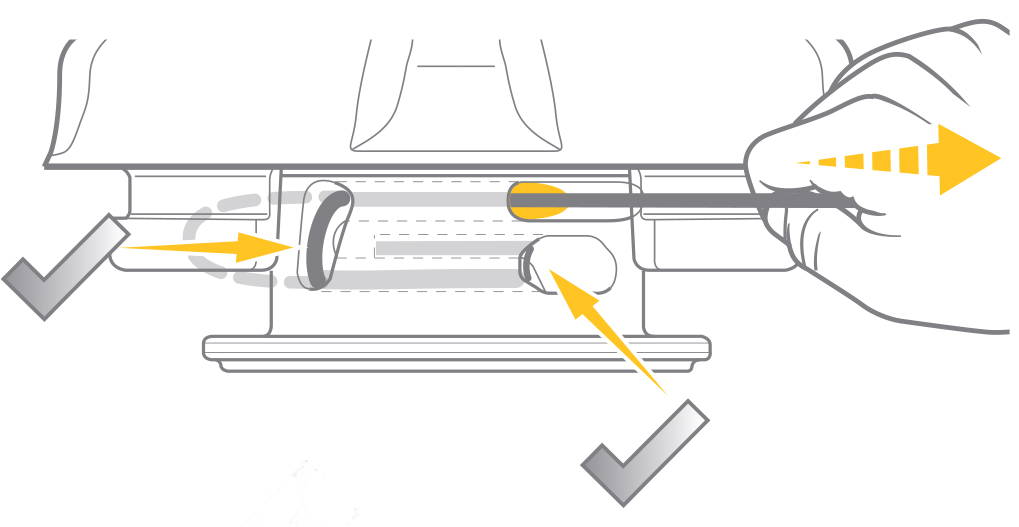
Step 3: Re-Lace Boot
-
For BOTH Systems: Start at the toe, feed cable or lace through all eye stays and tongue guides and insert both ends into reel housing.
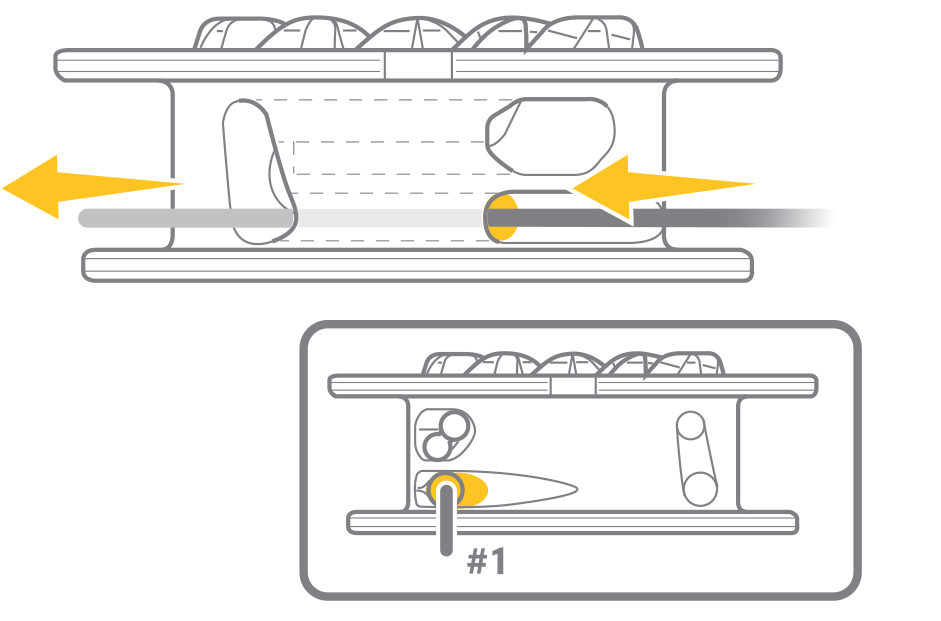
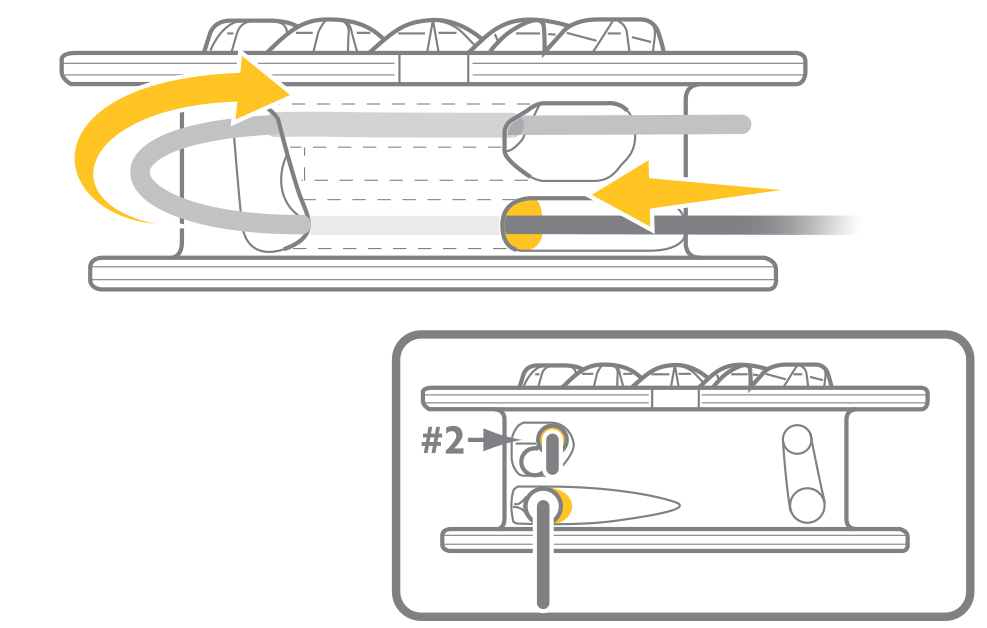
Step 4: Attach Lace to Spool
-
For H3 Systems: Insert the cable into the marked hole and pull through the other side, insert the end through the bottom hole and pull through, turning the cable back and inserting back it to the hole it was just pulled through until it stops to lock. Pull cable tight to spool while keeping the locked loop in place. Repeat for the other side.
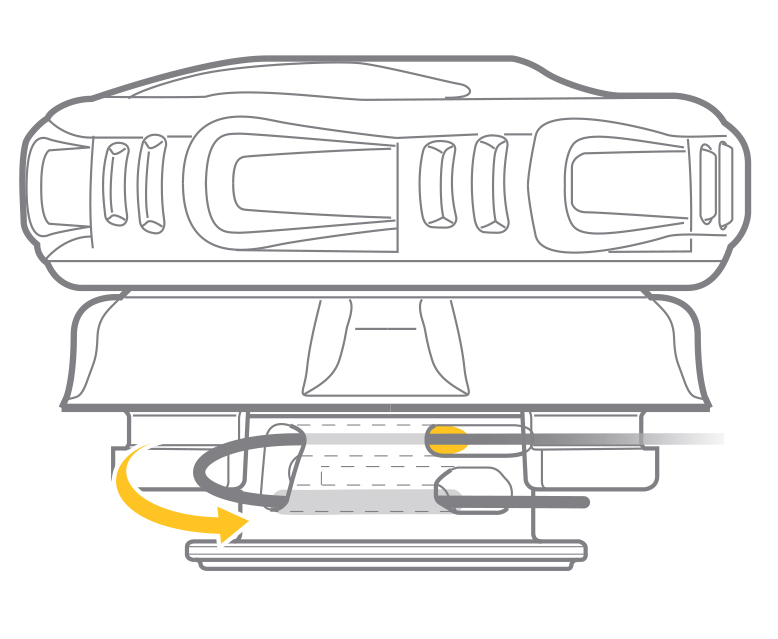
-
For M3 Systems: Insert the cable into the marked hole and pull through the other side, circle back through and insert through the top hole and pull through, re-insert into the hole it was just pulled through until it stops to lock. Pull cable tight to spool while keeping the locked loop in place. Repeat for the other side.
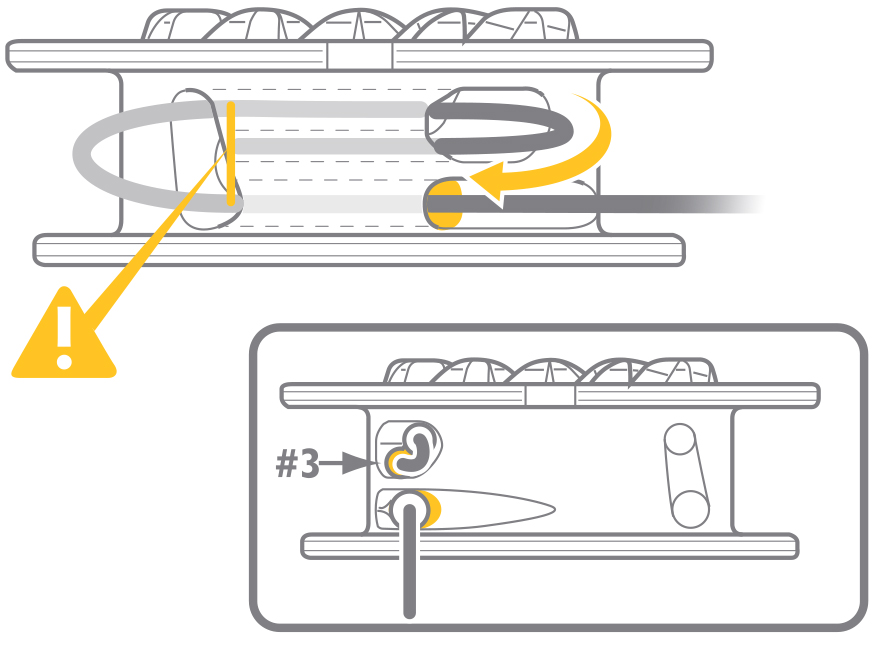

-
For H3 Systems Using Lace (Burton): Insert lace into the smaller end of the hole and pull through, tie a knot at the end large enough to keep the lace from being pulled back through, and pull lace tight. Repeat for the other side.
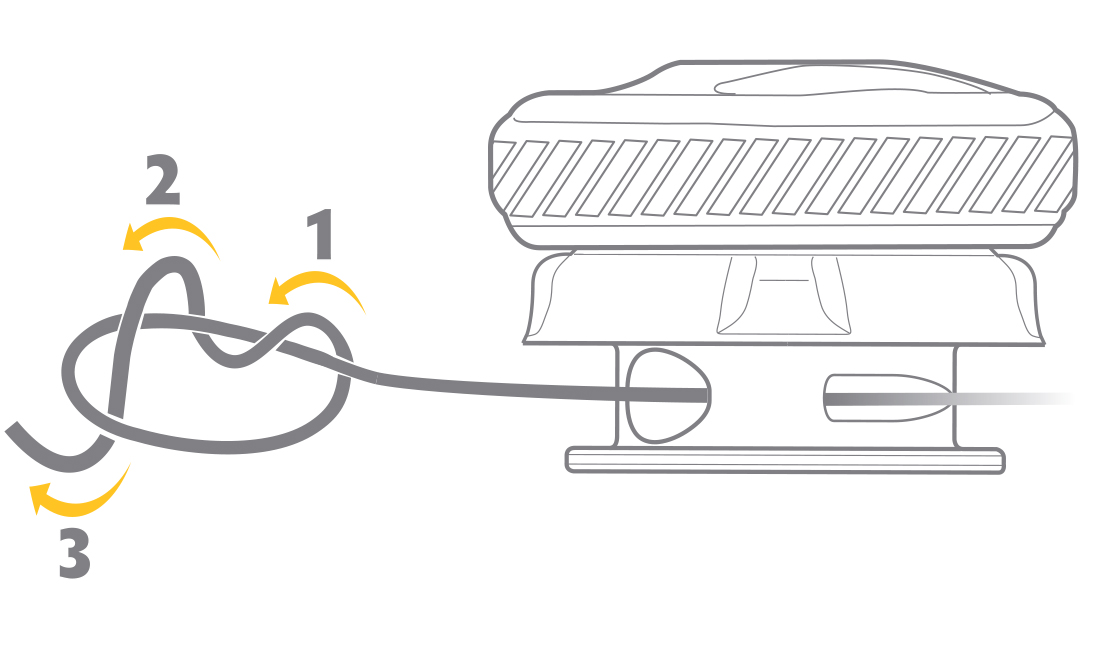
Step 5: Re-Attach Spool & Dial
-
For H3 Systems: Pull excess cable or lace to seat reel in housing, rotate dial to the left until it locks and you hear a click, and push dial in to tighten extra cable or lace.
-
For M3 Systems: Pull excess cable or lace to install spool into housing, make sure no cable or lace is caught under spool, replace dial and tighten down by turning the T6 tool clockwise, and push dial in to tighten extra cable or lace.
Filed Under: Snowboard Boots
| Permalink