

Your Shopping Cart
Loading...
Hot Items
Ski & Snowboard Outlets
Ski Tuning: How to Repair Your Ski Bases
Posted April 17, 2014 @ 5:55pm | by Dylan Lavoie
***Disclaimer*** It is best and we recommend having your skis tuned and worked on by a trained professional. Your safety is important and comes first. However, this is a DO IT YOURSELF tutorial on basic ski repair. These processes are an easy step-by-step way to fix your gear with limited tools. If you were to bring your equipment into a ski shop, the repair process would be more in depth/involved and the quality of work would be higher than what is demonstrated in this blog.
Whether its early, mid, or late season and it almost inevitable you will damage your ski or snowboard bases. A fresh piece of protruding ice on the east to a gnarly rock collision on the west, gouges and core shots are part of the sport. Bringing it to your local shop for repairs throughout the season can become costly, but fixing these problems can be done at home with the right tools.
First is identifying what level of damage you delivered to your base. Superficial dings to devastating core shots all require a different approach. Step one is the same for all types of damage and that is CLEANING YOUR BASE! A dirty base is one way to guarantee that your repair will not stand to to the test of time. Cleansing the dirt, salt, and whatever else possibly manages to adhere to your equipment ensures your repair will hold. There are many base cleaners available on the market, but a simple citrus cleaning agent does as good of a job as the rest.
Once you have cleaned your base, obtaining the right tools for the job is next in line. The main ingredients are going to be P-Tex, lighter, metal/plastic scraper or razor blade, and very fine sandpaper. For damage that has managed to get through the base to the core requires base weld, sometimes refereed to as metal bond. Lets go over P-Tex repairs first then core shots second.
So those pesky superficial scratches are driving you crazy. Don't let it, they are strictly visually disturbing and does not affect the performance of the ski. It may be difficult to ignore these hairline scrapes, but it is not worth filling. The best solution for this sort of damage is to give it a fresh hot wax. The wax will fill the scrapes and keep the skis gliding smooth without getting hung up or snagged on the snow.
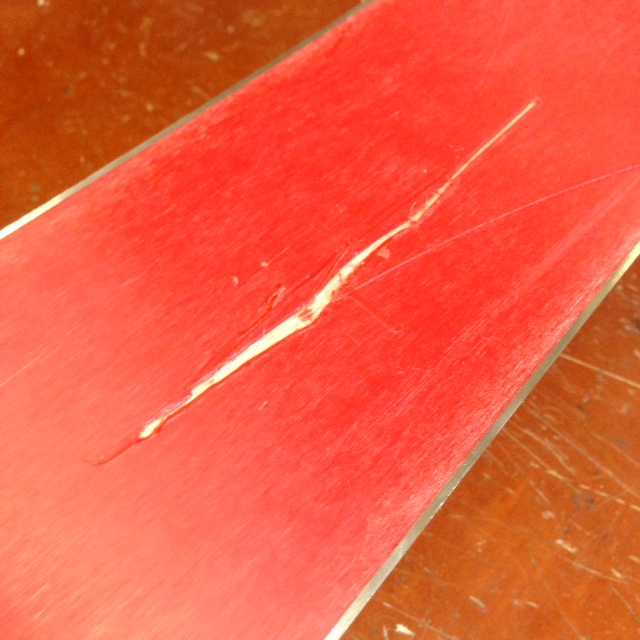
Gouges
For gouges that are up to 1mm or more is when P-Tex starts to come into play. Inspect the damage and remove any debris that could be caught inside the gouge, you could be surprised what you find inside. Cut away any hanging or loose pieces of base material that will no longer serve any purpose.
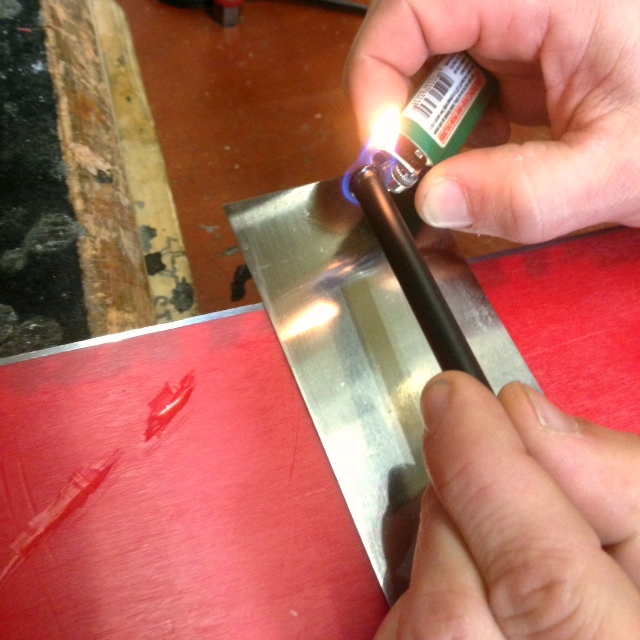
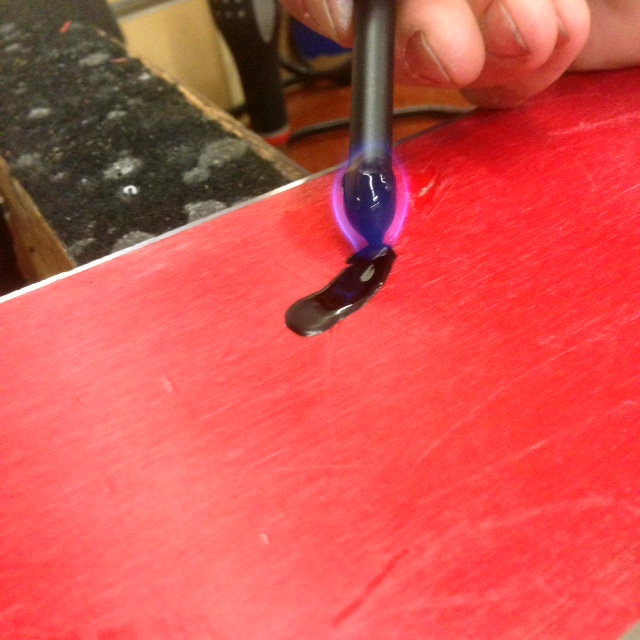
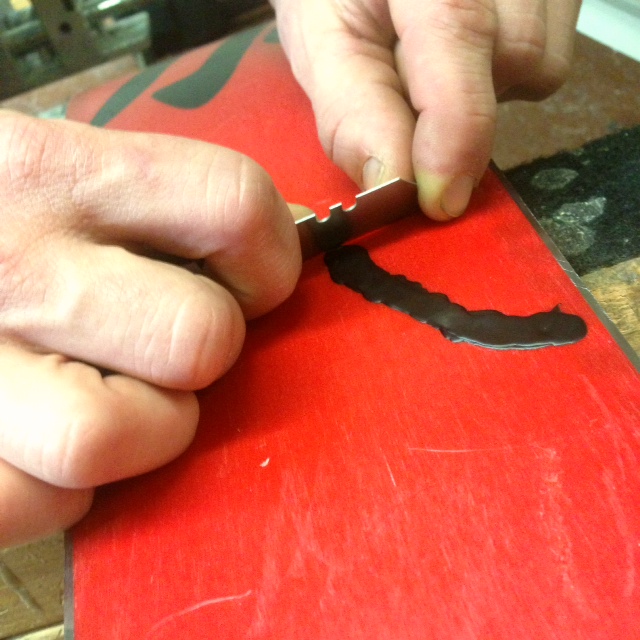
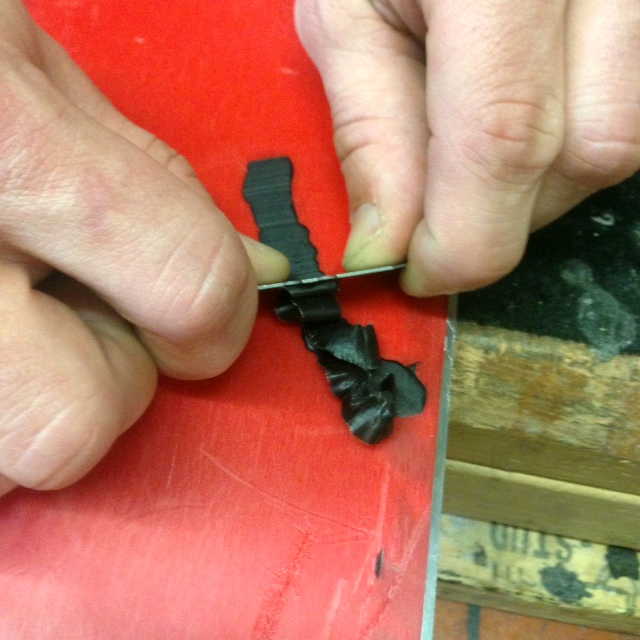
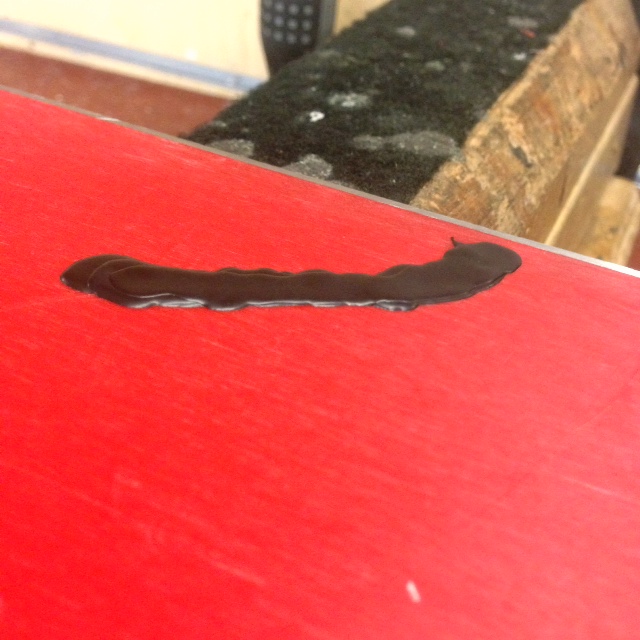
Take your lighter and begin heating the P-Tex stick. Hold the flame on the stick until it remains on fire. Rotating it while heating the P-Tex will speed up this process. Once you have a steady flame, start dripping the P-Tex into the gouge. Continue doing this until the P-Tex starts building up slightly higher than the base. Let the P-Tex cool for a few minutes and grab the tool you wish to scrape with -- A razor blade or a metal scraper seem to work the best. When you start removing the P-Tex, make sure to start from one end of the P-Tex you just melted and begin scraping over and over until you have made it flush with your base. Finish off with a few passes with the metal scraper and its almost as good as new.
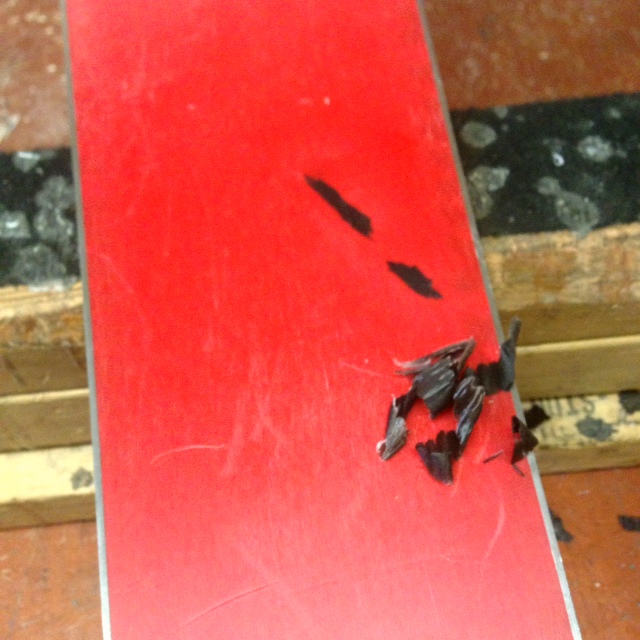
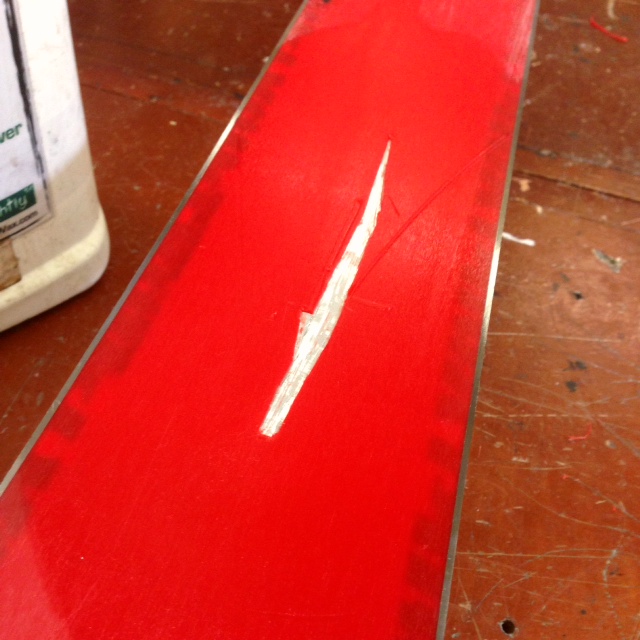
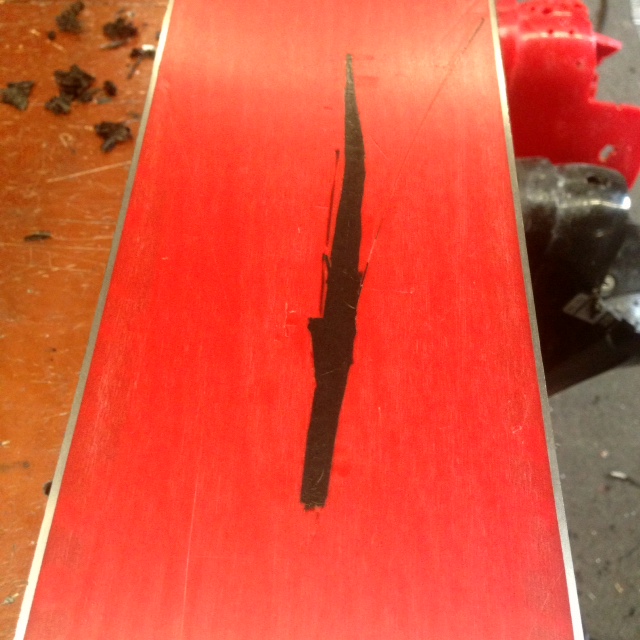
Core Shots
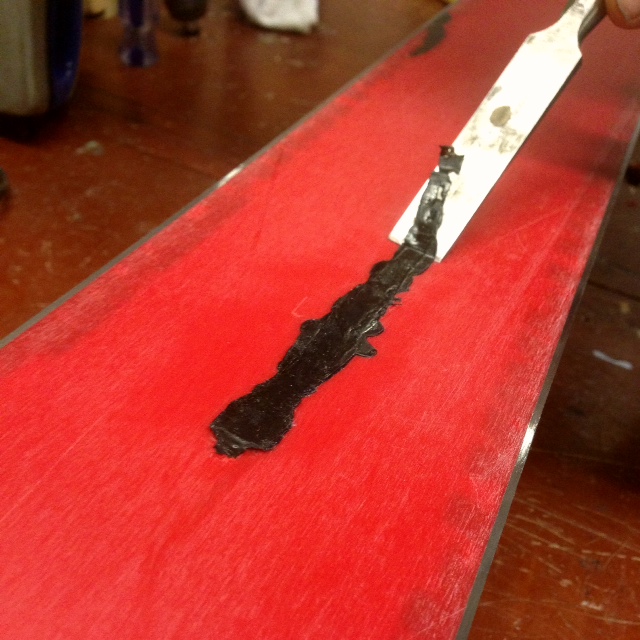
A core shot is when the core of the ski is exposed to the elements (water, moisture, snow etc..) instead of being protected. Moisture getting into the core of the ski is bad, that moisture can freeze too, so let's talk about how to fix it. Core shots are the most tricky and require the most work. If your skis have taken a blow so gnarly that it has managed to get to the core further steps are needed to make sure it holds. Just the same as all other repairs clean, remove debris, and cut away scrap.
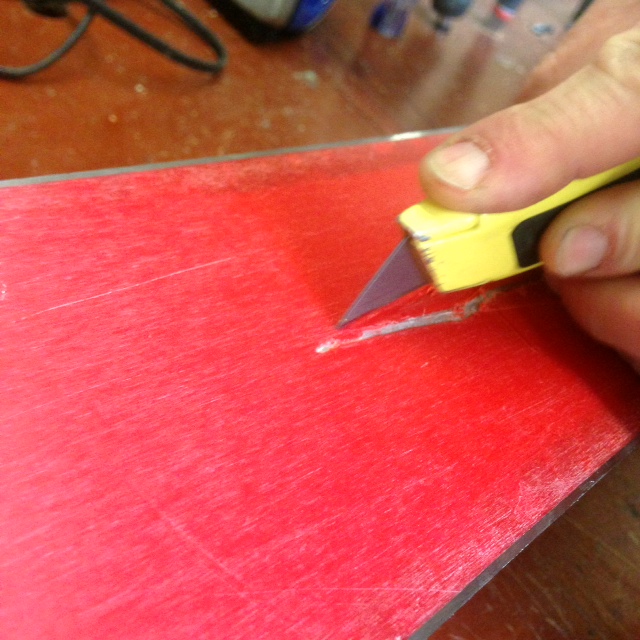
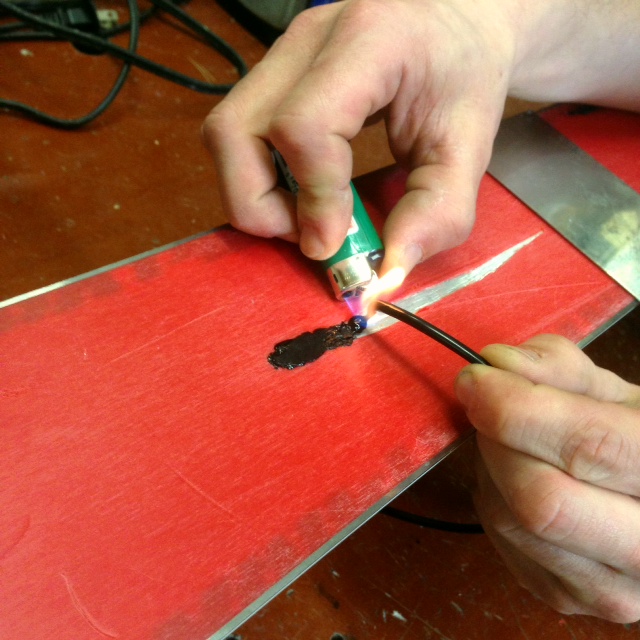
Now that the ski is clean you are going to need base weld or sometimes called metal bond. First proceed with caution, once the base weld becomes hot it stays hot. Getting it on your skin hurts and will burn for many seconds after it gets on you (but that's all part of the fun anyway, right!?). Same as P-Tex, heat the base weld until it begins to drip. More often or not you will need to constantly keep fire on the base weld for it to continue dripping. Fill the damage until it rises above the base slightly.
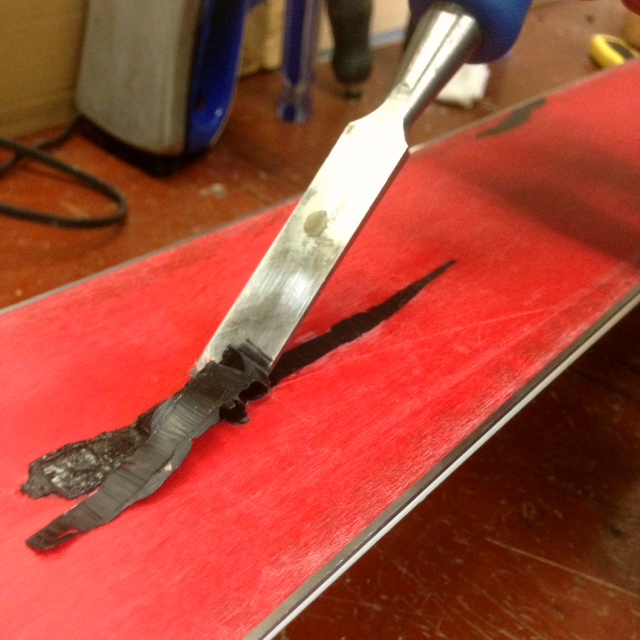
This is when it gets a bit tricky. Since its a thicker material with a metal agent imbedded inside, air pockets often form. Getting these air pockets out is important, but you must let the base weld cool for 20 to 30 seconds. Before committing to taking the metal scraper and pressing the base weld down firmly. First test if it has cooled down enough by gently touching a corner with your scraper. If its still too hot the base weld will try to adhere to your scraper. If this happens continue to let cool for 10 more seconds and repeat until you can touch the base weld and the scraper breaks away with no adhesion.
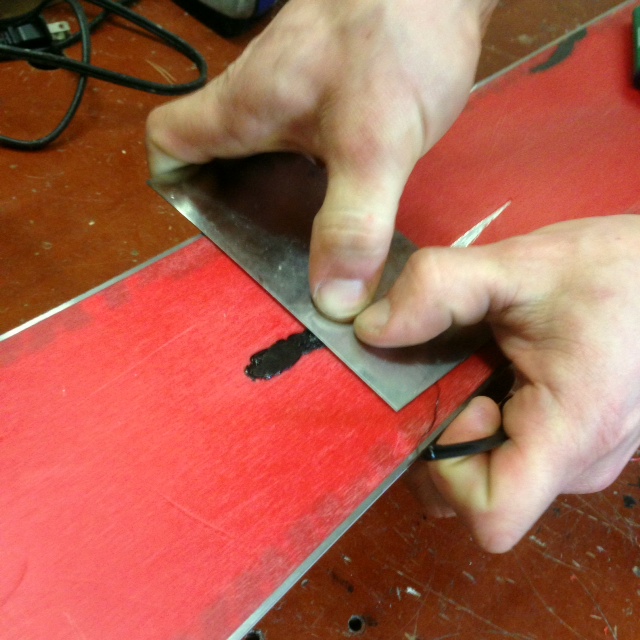
Begin pressing firmly down on the base weld using the metal scraper. Starting on one side and working across will provide a better "pack" to the core shot. This process removes the air and gets the material into all areas of damage that may not be seen or accessible. After doing this you may realize that its low in certain spots. Simply repeat the same process with the base weld until its once again slightly raised above the base after you have packed it in.
Base weld does not scrape like P-Tex. Use a razor blade and put it flush (sharp side) on the base. Get the blade, chizzle, scraper or tool of your choice, underneath one end of the base weld and begin cutting anything that is higher than the base. Once you have removed the excess you may find very tiny air pockets. These are nothing to worry about, you can add more base weld if wanted, but your skis are now secure from moisture getting inside.
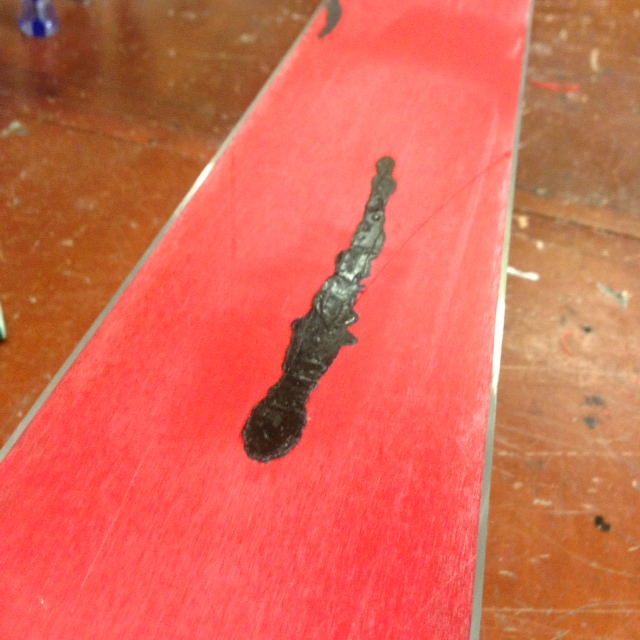
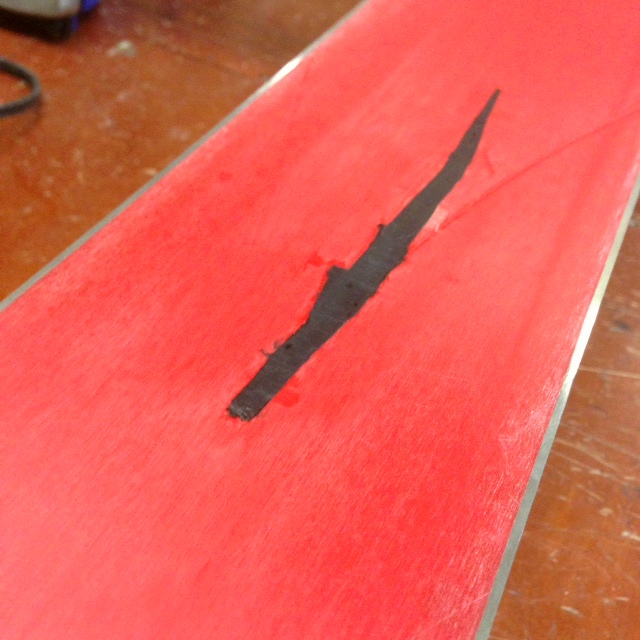
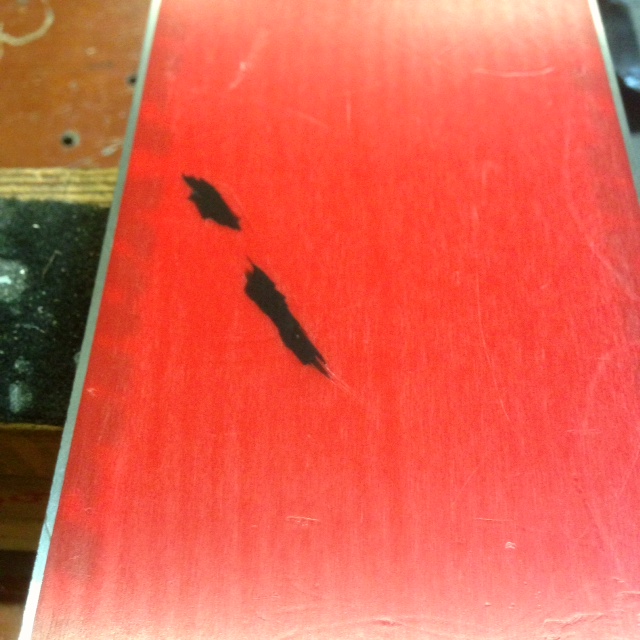
Once the base weld is completed (depending on your supplies of P-Tex and/or the level of love you want to put into your skis), you can apply a layer or two of P-Tex to the finished area of base weld. This is will give the skis a nicer, more smooth feeling finish.
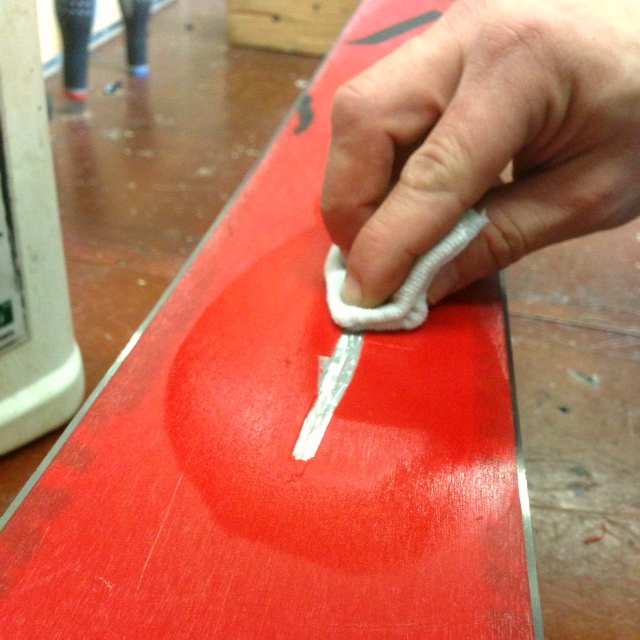
After all types of repair putting a fresh coat of wax completes the process and you’ll be good to go. P-Tex is generally an easy fix and base welding takes a little getting used to, but if your committed to fixing your own equipment after a few attempts you’ll be your own technician. Free from paying the local shop time and time again, now you can save up for tickets and better gear!
![]()